Introduction to Chocolate Thumbprint Cookies
When it comes to desserts that marry playful aesthetics with rich, delicious flavors, chocolate thumbprint cookies surely hold a special place. These delightful treats are not just a feast for the eyes but also a comforting bite of nostalgia reminiscent of childhood baking sessions. With their simple yet elegant design, filled with luscious chocolate or jam, they have a way of making any moment special.
Why Chocolate Thumbprint Cookies Are the Ultimate Dessert
What sets chocolate thumbprint cookies apart from other desserts? For starters, their versatility! You can fill them with a variety of ingredients—like smooth chocolate ganache or fruity preserves—making them perfect for any occasion. Whether you’re hosting a casual get-together or celebrating a milestone, these cookies can take center stage with their charming “thumbprint” indentation inviting endless possibilities for fillings.
Their texture also plays a significant role in their appeal. While the outside is slightly crisp, the inside is often tender and chewy. The combination creates a delightful contrast that keeps you coming back for more. Not to forget, they are incredibly easy to whip up! A few pantry staples like flour, sugar, butter, and cocoa powder are all you need to dive into this cookie adventure.
Want to impress your colleagues at the next office gathering? Bake a batch of these cookies and watch everyone swoon. Not only are they delicious, but they also look impressive. Imagine a platter filled with rich, glossy chocolate cookies that are just waiting to be devoured!
Getting Creative with Your Thumbprints
The beauty of chocolate thumbprint cookies is that they allow for creativity. Have fun experimenting with different fillings—think spiced caramel or peanut butter for a twist on the classic. According to the American Institute of Baking, baking not only satisfies your sweet tooth but also reduces stress, making it an essential activity for young professionals like us.
In the world of baking, there’s something deeply rewarding about making something from scratch. So gather your ingredients, channel your inner pastry chef, and prepare to create a cookie that’s not only tasty but also a lovely conversation starter.
Check out this guide for more tips and tricks on cookie baking and decorating. Remember, the next batch of chocolate thumbprint cookies you whip up could be your favorite yet!
Ingredients for Chocolate Thumbprint Cookies
When it comes to making chocolate thumbprint cookies, having the right ingredients is essential to create that melt-in-your-mouth experience everyone craves. Here’s what you’ll need for both the cookies and the delightful ganache topping.
Essential Ingredients for the Cookies
To whip up a batch of these delicious cookies, gather the following:
- All-purpose flour: A foundational ingredient for structure.
- Unsweetened cocoa powder: This will give your cookies their rich chocolate flavor.
- Granulated sugar: Sweetness is key, and this helps balance the cocoa’s bitterness.
- Butter: Softened butter adds moisture and richness.
- Eggs: Essential for binding and creating that tenderness.
- Vanilla extract: A splash of vanilla enhances the overall flavor.
- Baking powder and salt: These will help your cookies rise and provide balance.
Key Ingredients for the Ganache
Now, let’s talk about the heavenly ganache that takes the cookies to the next level:
- Heavy cream: This will create a luscious, creamy consistency.
- Semisweet chocolate chips or chopped chocolate: Choose high-quality chocolate for the best flavor. This will be the star of your ganache!
By gathering these ingredients, you’re on your way to baking a batch of chocolate thumbprint cookies that will impress friends and family alike! If you want to learn more about how each element contributes to the texture and taste, check out this detailed baking guide for extra tips.
Preparing Chocolate Thumbprint Cookies
Making chocolate thumbprint cookies at home is a delightful experience that can bring back warm memories of baking with loved ones. This process isn’t just about following a recipe; it’s about creating an indulgence that can be shared and savored. Let’s break down the steps to make these irresistible cookies!
Creaming the Butter
Start with high-quality unsalted butter at room temperature, allowing for easy blending. In a large mixing bowl, add the softened butter:
- Aim for about 1 cup.
- Beat it with an electric mixer (or a wooden spoon, if you’re feeling nostalgic) until it becomes light and fluffy.
- This step usually takes about 2-3 minutes.
Creaming is crucial because it incorporates air into the butter, giving your cookies a tender texture.
Mixing in the Sugars
Once the butter is creamed, it’s time to add sweetness. Use:
- ½ cup granulated sugar
- ½ cup packed brown sugar
Mix these sugars into the creamed butter until well combined. You’re looking for a fluffy consistency that enhances the flavor of your chocolate thumbprint cookies. Want a little expert tip? Brown sugar will add delightful moisture and chewiness to your cookies, thanks to its molasses content.
Adding Wet Ingredients
Next up, we’re going to add some richness with the wet ingredients. You need:
- 1 large egg
- 1 teaspoon vanilla extract
Make sure the egg is room temperature too, as it helps incorporate smoothly into the mixture. Beat the egg and vanilla into the sugar-butter blend until you achieve a cohesive batter. The aroma from the vanilla is often what gets the taste buds excited even before you’ve started baking!
Incorporating the Dry Ingredients
Now it’s time for some dry ingredients. In a separate bowl, combine:
- 1 ¾ cups all-purpose flour
- ½ cup unsweetened cocoa powder
- 1 teaspoon baking soda
- ½ teaspoon salt
Sift these dry ingredients together to avoid lumps, ensuring a smooth dough. Gradually add this dry mixture to the wet blend, mixing until just combined. Be careful not to over-mix; your cookies will be more tender if you stop as soon as you no longer see dry flour.
Forming and Chilling the Dough
We’re almost there! Scoop out tablespoons of dough to form balls (around 1 inch in diameter). Place them on a baking sheet lined with parchment paper. This is where the thumbprint magic happens:
- Use your thumb (or the back of a spoon) to press into the center of each ball, creating a well.
- Cover the sheet with plastic wrap and chill in the refrigerator for 30 minutes. Chilling is essential as it helps the cookies maintain their shape while baking.
Baking the Cookies
Preheat your oven to 350°F (175°C). Once your dough is chilled, pop it in the oven for 10-12 minutes. You’ll know they’re done when the edges look firm, but the centers may still appear slightly soft. Allow them to cool on the sheet for a few minutes before transferring them to a wire rack.
Making the Chocolate Ganache
While your cookies cool, it’s time to prepare a delicious chocolate ganache. Simply heat:
- ½ cup heavy cream in a saucepan until it just simmers.
Pour the hot cream over 1 cup of chopped semi-sweet chocolate in a bowl. Stir until smooth and glossy. This magical mix will soon transform your cookies into a decadent treat.
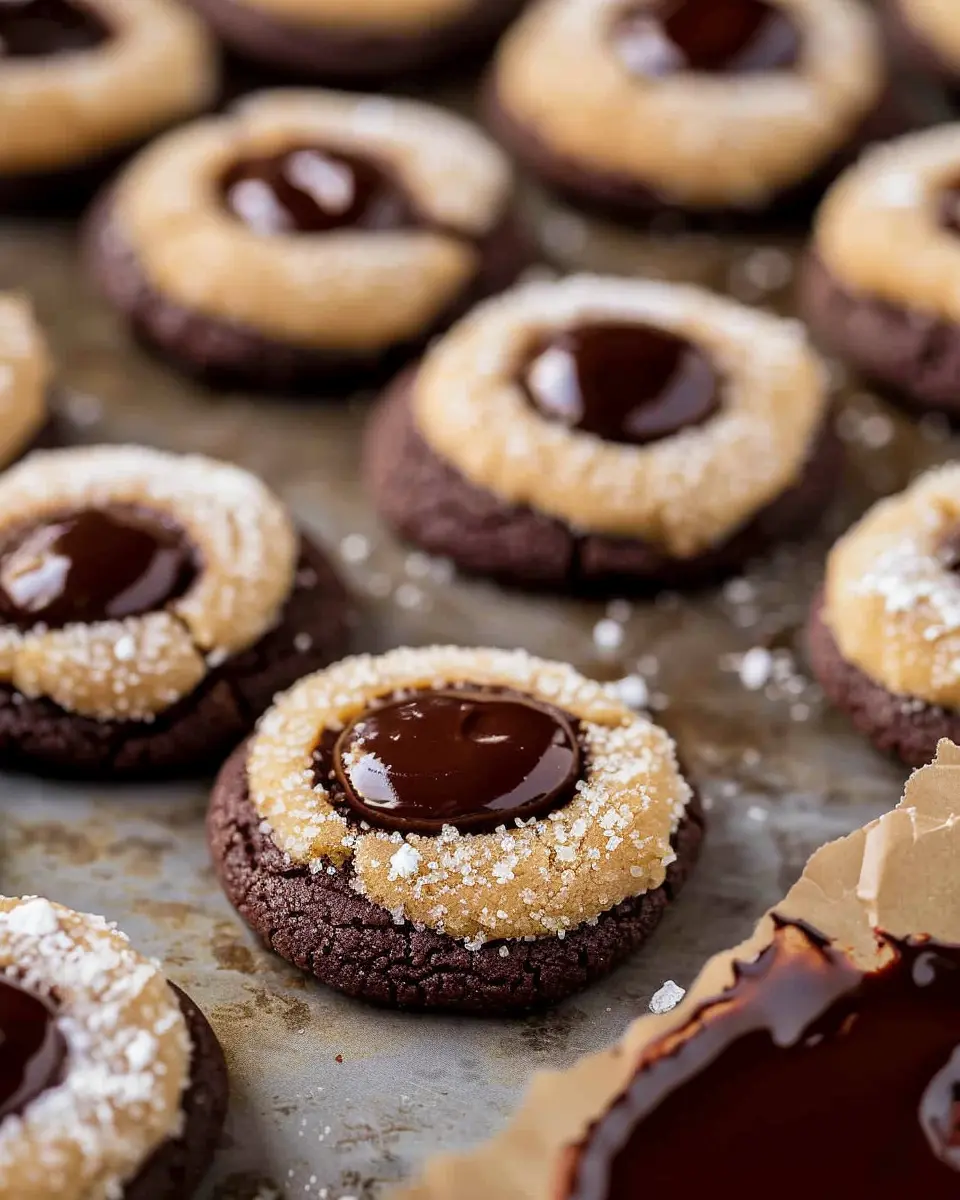
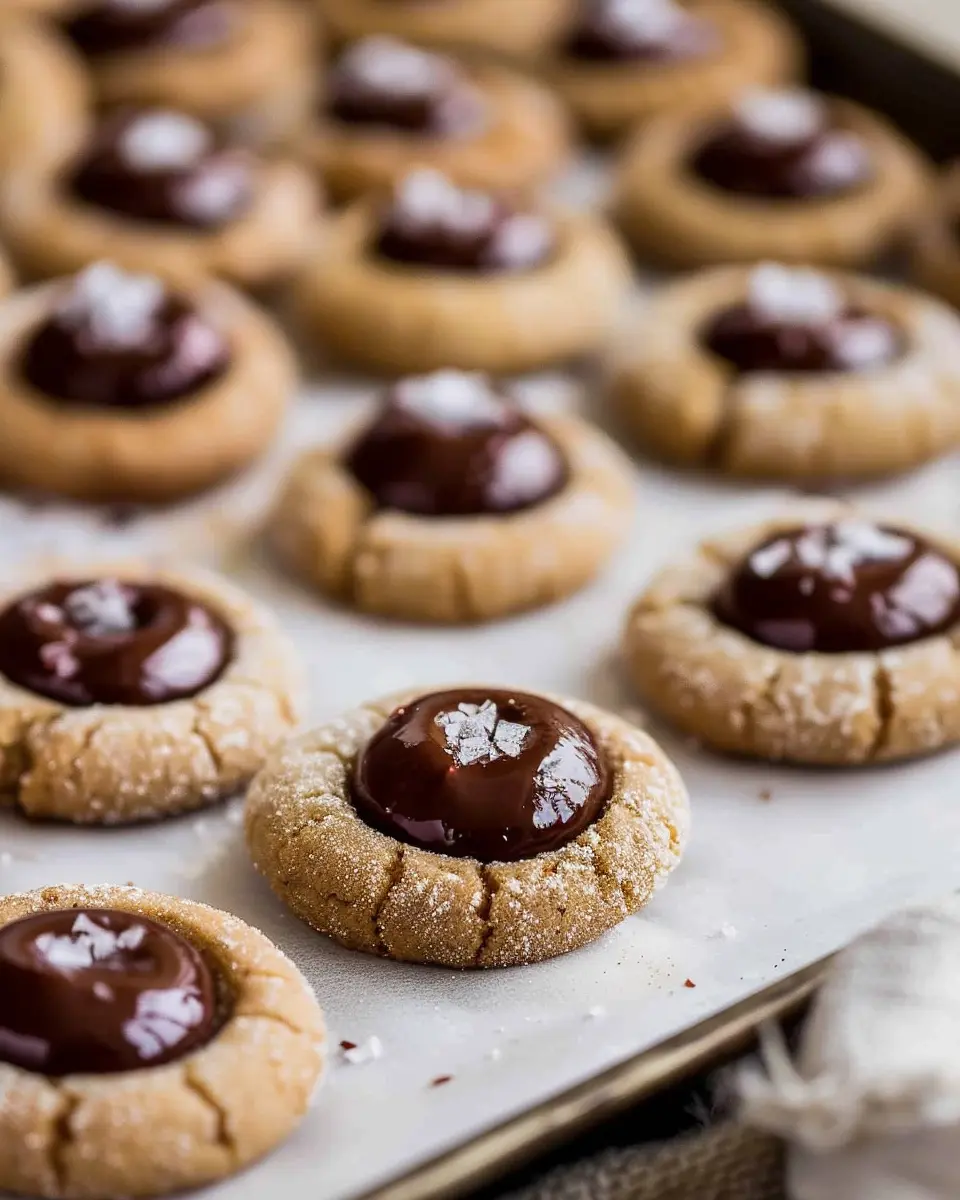
Filling the Thumbprints
Once your cookies are completely cool and the ganache is nice and thickened, it’s time to fill those thumbprints. Using a small spoon or a piping bag, carefully fill each indentation with the silky chocolate ganache. Let them set for about 15-20 minutes and enjoy your homemade chocolate thumbprint cookies with friends or family!
These cookies are not only a treat for your taste buds but also a wonderful way to connect with others over a shared passion for baking. If you’re interested in more delicious recipes, check out tips on enhancing chocolate flavors here. Happy baking!

Variations on Chocolate Thumbprint Cookies
Nutty Chocolate Thumbprint Cookies
If you’re a fan of chocolate thumbprint cookies, why not add a nutty twist? Incorporate your favorite nuts for texture and flavor that truly elevate these delightful treats. Chopped hazelnuts or walnuts mixed into the dough provide a rustic crunch. You can even roll the dough balls in crushed almonds before baking for an extra nutty layer.
For the filling, swap the traditional jam with a nut-based spread like hazelnut chocolate spread or almond butter. Not only do these options add depth, but they also introduce a new flavor profile that every nut lover will enjoy.
Fun Flavor Twists: Spice and Heat
Feeling adventurous? Spice up your chocolate thumbprint cookies with unexpected flavors. A pinch of sea salt not only enhances the chocolate but adds a surprising burst of savory goodness. For those who love a kick, consider adding cayenne pepper to the dough or using a spiced raspberry jam for the center. It’s a quirky combo that may just become your new favorite!
Why not pair your cookies with a warm cup of coffee or an herbal tea? Studies suggest that the complex flavors of chocolate and coffee create a perfect balance, enhancing the overall tasting experience.
With so many variations, chocolate thumbprint cookies can be a creative outlet in your kitchen. Experimenting with different flavors not only keeps your baking routine fresh but also sparks joy when sharing your delicious creations with others. Check out Food Network or Serious Eats for tips on how to store and serve these delectable treats.
Baking Notes for Chocolate Thumbprint Cookies
Tips for Perfect Texture
When making chocolate thumbprint cookies, achieving the perfect texture is key. To ensure your cookies are delightfully chewy yet soft, be mindful of the following:
- Chill the Dough: Allowing the dough to chill in the fridge for at least 30 minutes helps to firm it up, making it easier to shape and manage.
- Measure Precisely: Use a digital scale or measuring cups to get your ratios right. Too much flour can lead to dry cookies.
- Don’t Overmix: When combining ingredients, mix until just combined. Overmixing can develop gluten, yielding tough cookies.
Common Mistakes to Avoid
Even seasoned bakers can make mistakes—so here are some common pitfalls to steer clear of when baking chocolate thumbprint cookies:
- Skipping the Thumbprint: Press your thumb (or a teaspoon) into the center of the dough ball before baking to create that signature thumbprint for holding yummy fillings.
- Ignoring Oven Temperature: Always preheat your oven to ensure even baking. An oven thermometer can help check if it’s accurate.
- Not Allowing Cookies to Cool: Be patient! Letting cookies cool on the baking sheet for a few minutes before transferring them to a wire rack helps them set properly.
By keeping these tips in mind, you’ll be on your way to creating indulgent, mouthwatering cookies that everyone will love. For more in-depth baking advice, check out King Arthur Baking for expert tips and techniques. Happy baking!

Chocolate Thumbprint Cookies: The Best Indulgent Treat for Home Bakers

Chocolate Thumbprint Cookies are the perfect indulgent treat for any occasion, combining rich chocolate flavor with a delightful surprise in the center.
- Prep Time: 20 minutes
- Cook Time: 12 minutes
- Total Time: 32 minutes
- Yield: 24 cookies 1x
- Category: Dessert
- Method: Baking
- Cuisine: American
- Diet: Vegetarian
Ingredients
- 1 cup unsalted butter, softened
- 1 cup granulated sugar
- 2 large eggs
- 2 teaspoons vanilla extract
- 2 cups all-purpose flour
- 1/2 cup cocoa powder
- 1/2 teaspoon baking powder
- 1/4 teaspoon salt
- 1/2 cup chocolate chips for filling
Instructions
- Preheat the oven to 350°F (175°C).
- In a bowl, cream together the butter and sugar until light and fluffy.
- Add the eggs one at a time, mixing well after each addition, then stir in the vanilla.
- In a separate bowl, whisk together the flour, cocoa powder, baking powder, and salt.
- Gradually add the dry ingredients to the wet ingredients and mix until combined.
- Form the dough into small balls and place them onto a baking sheet.
- Make an indentation in the center of each ball with your thumb.
- Fill each indentation with chocolate chips.
- Bake for 10-12 minutes, then allow to cool on a wire rack.
Notes
- Ensure the butter is at room temperature for better mixing.
- Experiment with different fillings such as jam or caramel.
Nutrition
- Serving Size: 1 cookie
- Calories: 150
- Sugar: 10g
- Sodium: 50mg
- Fat: 8g
- Saturated Fat: 5g
- Unsaturated Fat: 3g
- Trans Fat: 0g
- Carbohydrates: 18g
- Fiber: 1g
- Protein: 2g
- Cholesterol: 30mg
Keywords: Chocolate Thumbprint Cookies, cookies, baking, dessert