Introduction to Chocolate Thumbprint Cookies
The Irresistible Charm of Chocolate Thumbprint Cookies
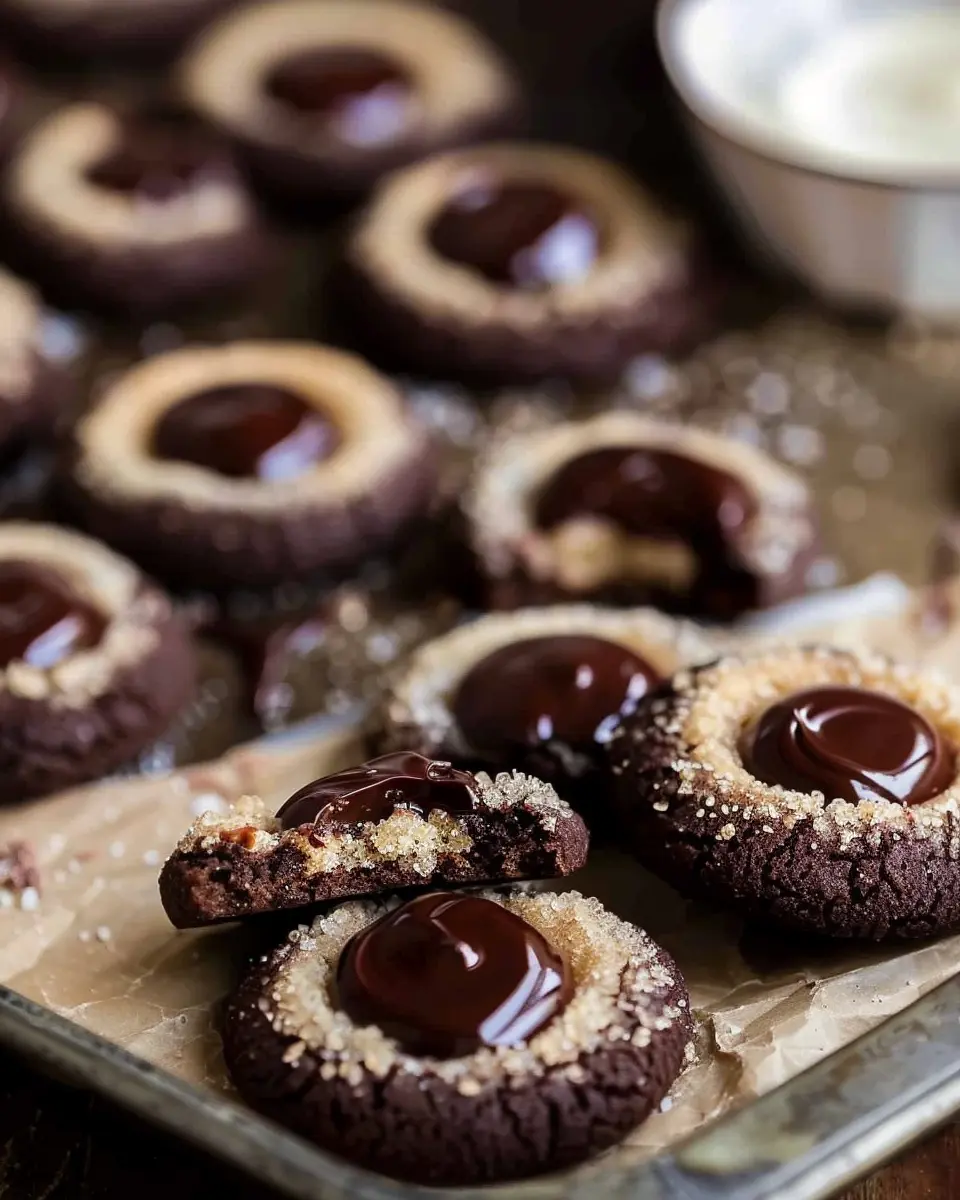
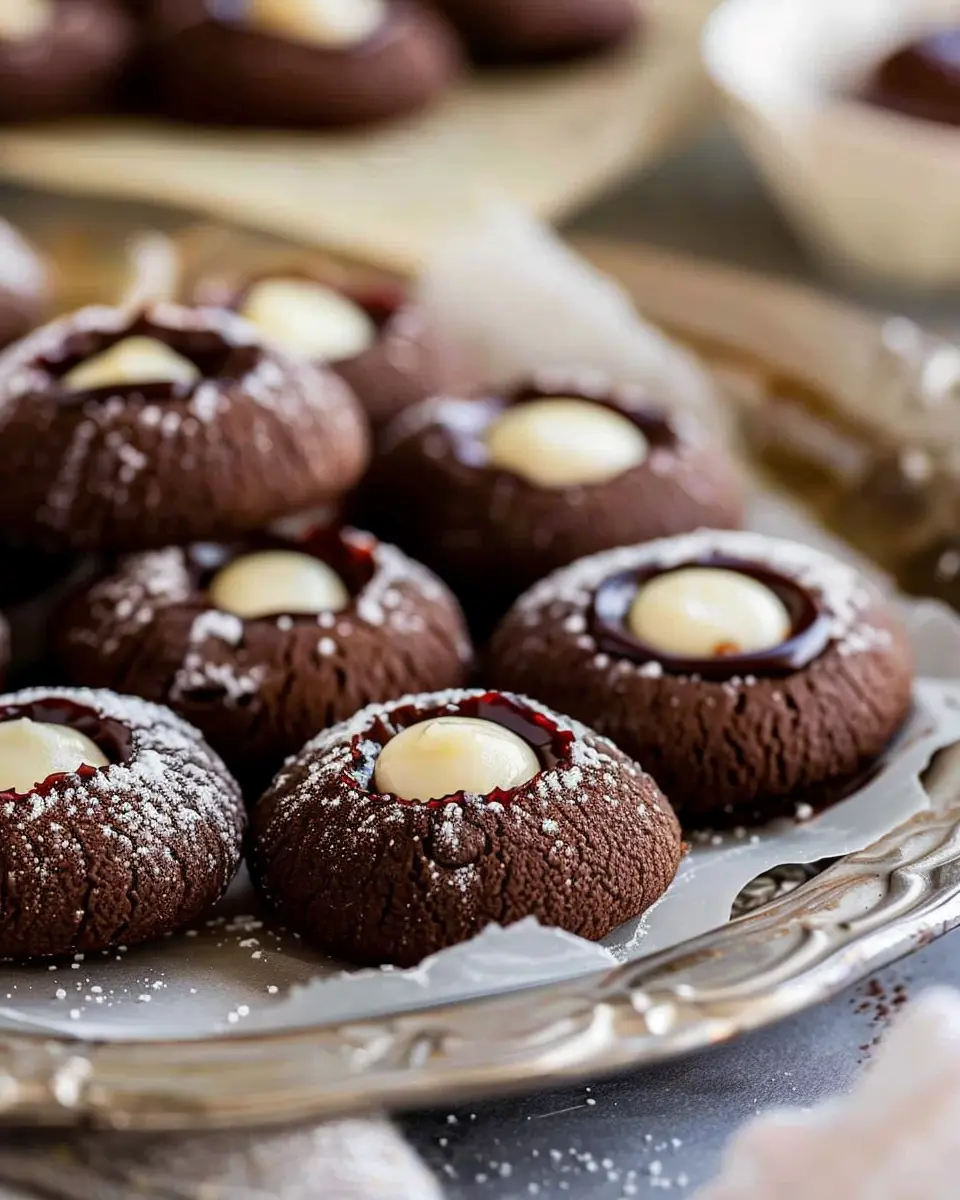
There’s something truly magical about chocolate thumbprint cookies. Picture this: a delicate, melt-in-your-mouth cookie with an inviting crater at its center, filled with luscious chocolate ganache or jam. They’re not just a treat; they are little packages of joy, perfect for any occasion!
What makes these cookies particularly special is their unique texture. The outer layer is often slightly crisp, while the interior remains soft and buttery. This delightful contrast, combined with the sweet and rich filling, creates a cookie experience that’s hard to resist. Whether you’re baking for a holiday gathering or a casual get-together, chocolate thumbprint cookies will undoubtedly steal the show.
But why stop at just chocolate? You can experiment with various fillings, from classic dark chocolate to fruity jams, adapting this recipe to suit your cravings. The versatility lets your creativity shine, making each batch uniquely yours. According to the American Institute for Cancer Research, incorporating more treats like these into your diet can add a little sweetness to life—just remember to indulge in moderation!
If you’re new to baking, fear not! These cookies are surprisingly simple to make. The basic ingredients you’ll need include butter, sugar, flour, and of course, chocolate for that rich filling. Moreover, they often require minimal prep time, making them an excellent option for those busy weekdays or unexpected guests.
It’s easy to fall in love with chocolate thumbprint cookies, and trust me, your friends and family will thank you. If you’re ready to embark on this delectable adventure, gather your ingredients and let’s get baking! For more tips on how to perfect your baking skills, check out resources from trusted sources like King Arthur Baking or Serious Eats.
So, are you ready to dive into the world of these delightful cookies? Grab your apron, and let’s start a delicious journey that’s bound to enchant your taste buds and warm your heart!
Ingredients for Chocolate Thumbprint Cookies
When it comes to creating delicious chocolate thumbprint cookies, the right ingredients make all the difference. Let’s break them down into two essential categories: the cookie base and the luscious filling.
Essential ingredients for the cookies
To whip up these delightful cookies, you’ll need the following:
- Unsalted butter (1/2 cup): For that rich, creamy texture.
- Granulated sugar (1/3 cup): To sweeten without overwhelming.
- Brown sugar (1/3 cup): This adds a hint of caramel flavor.
- Egg yolk (1 large): A key ingredient for moisture and richness.
- Vanilla extract (1 teaspoon): Enhances the overall flavor.
- All-purpose flour (1 cup): The base for our cookies.
- Cocoa powder (1/3 cup): You can’t have chocolate thumbprint cookies without chocolate!
- Baking powder (1/2 teaspoon): To give them that perfect lift.
Ingredients for the chocolate bourbon ganache
Now, for the heavenly ganache, gather these:
- Semi-sweet chocolate chips (1 cup): The star ingredient for a rich filling.
- Heavy cream (1/2 cup): To create that luscious, velvety texture.
- Vanilla extract (1 teaspoon): Adds depth to the flavor.
Feeling inspired? Check out more baking tips to get the best result. With these ingredients, you’re well on your way to baking up some delightful chocolate thumbprint cookies!
Preparing Chocolate Thumbprint Cookies
Getting ready to whip up a batch of chocolate thumbprint cookies is an exciting kitchen endeavor perfect for any occasion. Whether you’re preparing for a cozy gathering or simply indulging your sweet tooth, these delightful cookies are sure to impress. Let’s break down the process step-by-step, so you can enjoy your time baking without any hiccups.
Cream the Butter and Sugars
Start by bringing your butter to room temperature; it makes a world of difference for achieving that creamy texture. Once soft, place it in a mixing bowl and add both granulated and brown sugars. Using a hand mixer or stand mixer, cream the butter and sugars together for about 2-3 minutes until the mixture is light and fluffy. This not only adds a delicious sweetness but also helps create air pockets in your cookies, making them soft and tender.
Pay attention to the sugars: the brown sugar will contribute that classic, rich flavor, while the white sugar helps promote a nice, crispy edge.
Mix in Egg Yolk and Vanilla
Next up, it’s time to add one egg yolk along with a splash of pure vanilla extract. The egg yolk helps bind the ingredients while contributing moisture and richness, while the vanilla adds that warm, aromatic touch you crave in baked goods. Mix until everything is just combined—overmixing can lead to tough cookies, and we definitely want them to be melt-in-your-mouth delicious!
Incorporate the Flour and Salt
Now, you’ll want to gently fold in all-purpose flour and a pinch of salt. The flour is the backbone of these chocolate thumbprint cookies, helping them hold their shape. The salt? It enhances the flavors and balances the sweetness. I recommend sifting the flour before adding it to ensure there are no lumps, allowing for a smooth dough. Mix until just combined; it’s okay if there are a few flour streaks—overworking the dough will lead to less tender cookies.
Shape and Chill the Cookie Dough
With your dough ready, it’s time to shape it into small balls—about 1 inch in diameter. You’ll want to place these on a baking sheet lined with parchment paper. Once you’ve shaped them all, cover the sheet with plastic wrap and chill in the refrigerator for at least 30 minutes. This step is crucial for ensuring your cookies maintain their shape while baking, plus it helps to intensify the flavors.
Bake the Cookies and Create the Thumbprints
Preheat your oven to 350°F (175°C) and once your cookie dough has chilled, pop them in for about 10-12 minutes. As they start to bake, take a teaspoon and gently press your thumb (or a small round object) into the center of each cookie to create that signature thumbprint. This is where the real magic happens—don’t skip this step, as it’s essential for holding the ganache later on!
Prepare the Chocolate Bourbon Ganache
While the cookies are baking, it’s the perfect time to prepare your chocolate ganache filling. In a small saucepan, heat heavy cream until it’s just about to boil, then pour it over chopped chocolate in a mixing bowl. The heat from the cream will melt the chocolate, creating a luxuriously smooth ganache. Stir until well combined, and for an added flavor twist, consider using a splash of strong coffee instead of bourbon. It pairs fantastically with chocolate!
Fill the Thumbprints with Ganache
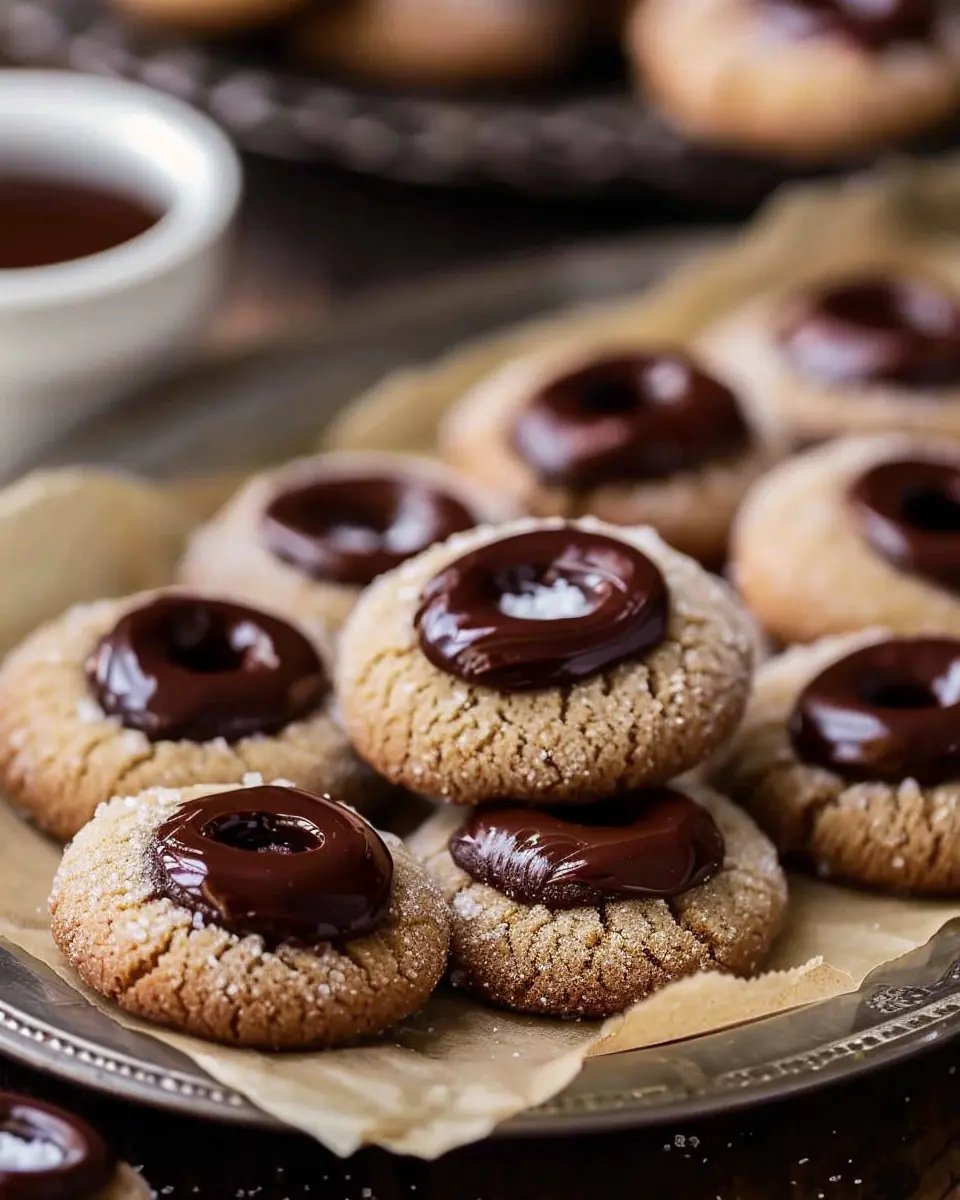
Once your cookies are out of the oven and have cooled slightly, it’s time to fill those thumbprints with your luscious ganache. Use a piping bag or simply a spoon to generously fill each indentation. Make sure you let them sit for a few minutes to allow the ganache to set before diving in. And there you have it—your chocolate thumbprint cookies are ready to be enjoyed!
Not only are they easy to make, but the combination of textures will keep you, and anyone you share them with, coming back for more. Enjoy crafting this delicious treat and perhaps pair it with a warm glass of milk or your favorite non-alcoholic beverage. Happy baking!
Variations on Chocolate Thumbprint Cookies
Chocolate thumbprint cookies are a delightful treat that can be adapted to suit various tastes. Here are a few variations to inspire your baking adventures.
Classic Chocolate Version
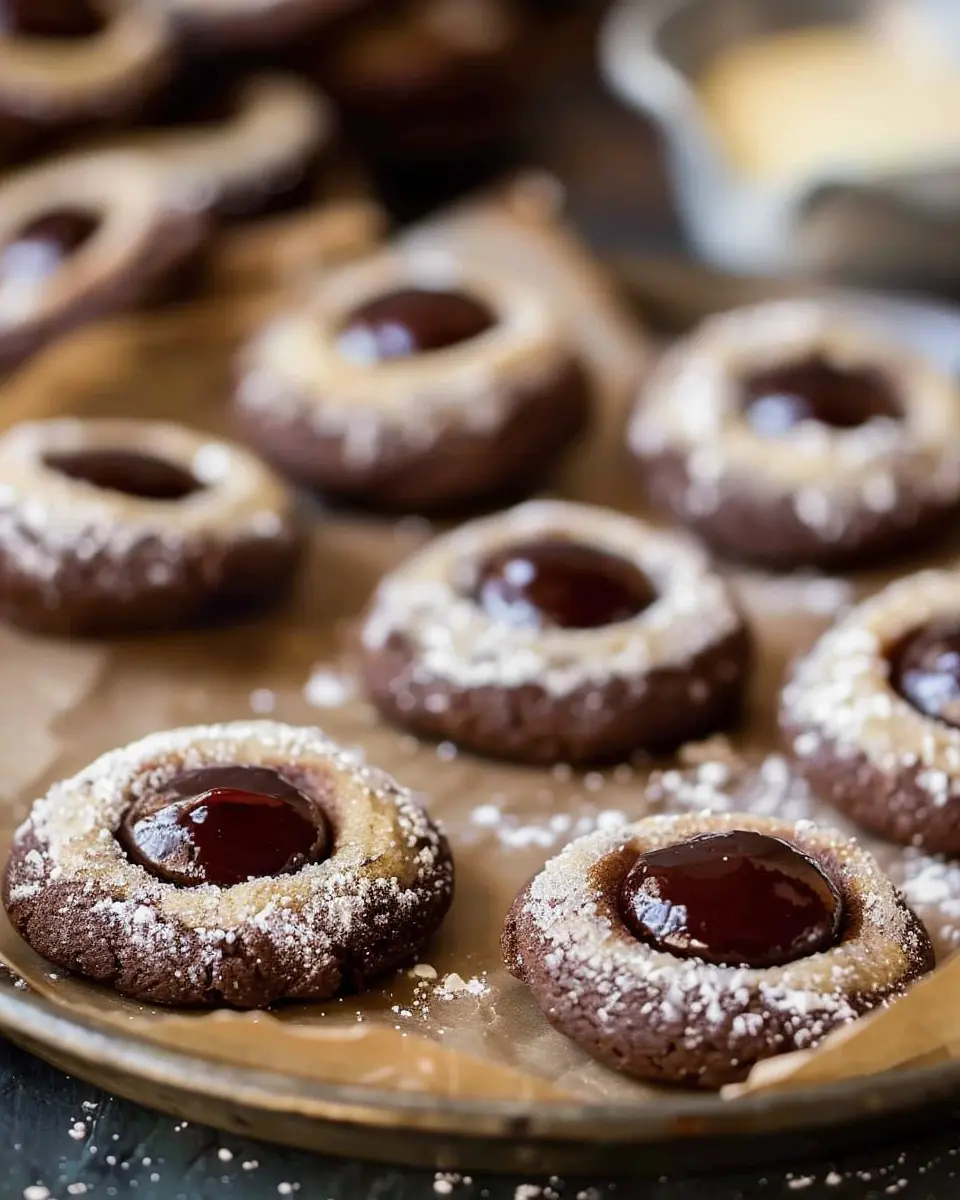
The classic chocolate thumbprint cookies are undoubtedly a crowd favorite. Made with rich cocoa powder, they offer a rich cookie base that pairs beautifully with your choice of filling. Popular options for the center include smooth chocolate ganache or raspberry jam. Don’t skimp on the chocolate—using high-quality chocolate will elevate your cookies. If you want to enhance the experience further, why not try sprinkling some sea salt on top right before serving?
Nutty Delights Version
For a nutty twist, consider adding ground nuts to your dough. This creates a subtle crunch and depth of flavor. Think of using almonds or hazelnuts, added straight into the batter. For the filling, why not go for a creamy peanut butter or almond butter glaze? The combination of flavors will dance on your taste buds. If you’d like to explore nut-free options, sunflower seed butter serves as a great alternative, allowing everyone to enjoy these chocolate thumbprint cookies.
A Vegan Alternative
Craving a plant-based take? You can easily create vegan chocolate thumbprint cookies. Substitute traditional butter with coconut oil and replace eggs with flaxseed meal combined with water as a binding agent. The goodness of dark chocolate keeps these cookies indulgent, plus the use of agave syrup brings in the sweetness. Serve them up with a fruit preserve like apricot or mixed berry, and you’ve got a delightful vegan dessert. For more vegan baking inspiration, check out resources like Minimalist Baker or Oh She Glows.
With these variations, your chocolate thumbprint cookies can cater to any palate, making them perfect for gatherings or a satisfying afternoon snack. Happy baking!
Baking Notes for Chocolate Thumbprint Cookies
Common Mistakes to Avoid
When crafting chocolate thumbprint cookies, it’s all too easy to stumble into a few traps. Here are some common pitfalls:
- Overmixing the Dough: While you want everything combined, overmixing can result in tough cookies rather than the tender treats you’re aiming for.
- Too Warm Dough: If your dough is too soft, chilling it for about 30 minutes can help maintain its shape. This tip is especially handy for ambitious cookie decorators!
- Mismatched Filling Temperatures: Make sure your jam or chocolate filling is at room temperature before spooning it into the indentations. Cold fillings can lead to cracks in the cookies.
Tips for a Perfect Texture
Achieving that dreamy texture in your chocolate thumbprint cookies is a delightful journey. Follow these tips for the best results:
- Use Quality Ingredients: High-quality chocolate can elevate your cookies from good to extraordinary. Opt for semi-sweet or dark chocolate that you enjoy eating on its own.
- Chill the Baking Sheet: For an even bake, consider chilling your baking sheet before placing your cookies on it. This will help the cookies spread uniformly and retain their signature shape.
- Experiment with Fillings: Don’t hesitate to mix it up! Nut butter, caramel, or even a dab of soft cream cheese can be amazing alternatives.
For further tips on cookie baking techniques, check out Serious Eats. Happy baking!
Serving suggestions for Chocolate Thumbprint Cookies
Pairing Ideas with Beverages
When it comes to chocolate thumbprint cookies, the right drink can elevate your dessert experience. Consider these delightful pairings:
- Coffee: A rich cup of freshly brewed coffee complements the deep chocolate flavor beautifully. For an added twist, try a dash of cinnamon for warmth.
- Milk: You can’t go wrong with the classic pairing of chocolate and milk. Whether it’s dairy or almond milk, this duo brings out the sweetness in every bite.
- Herbal Tea: For a lighter option, herbal teas like chamomile or mint can provide a refreshing contrast to the cookie’s rich chocolate.
Presentation Tips for Gatherings
Hosting a get-together? Make your chocolate thumbprint cookies the star of the dessert table! Here are some suggestions:
- Use a Decorative Platter: Arrange the cookies on a colorful plate or tiered stand to create visual appeal.
- Garnish Wisely: A sprinkle of powdered sugar or a drizzle of melted chocolate adds flair and sophistication.
- Create a Dessert Bar: Pair the cookies with an array of toppings like sprinkles, crushed nuts, or flavored whipped cream to allow guests to customize their treats.
Feeling adventurous? Check out this article on how to create a dessert charcuterie board for more ideas!
Tips for Making Perfect Chocolate Thumbprint Cookies
Importance of Chilling Dough
Chilling your dough is essential for achieving the perfect texture in your chocolate thumbprint cookies. When the dough is cold, it prevents excessive spread during baking, which can lead to cookies that are too flat. Ideally, you should chill the dough for at least 30 minutes. This small step can make a significant difference in achieving soft, chewy cookies with that coveted thumbprint shape. Plus, chilled dough is easier to work with when forming balls and indenting them.
Substitutions for Dietary Needs
Don’t let dietary restrictions stop you from enjoying delicious chocolate thumbprint cookies! Here are some easy substitutions:
- Gluten-free: Use a 1:1 gluten-free flour blend instead of all-purpose flour. Brands like King Arthur and Bob’s Red Mill have great options available.
- Dairy-free: Swap out regular butter for coconut oil or vegan butter. Your cookies will still be rich and tasty.
- Sugar alternatives: If you prefer a healthier option, consider using coconut sugar or stevia, adjusting quantities to taste.
These tweaks allow everyone to enjoy your delightful creations, so why not try them? For more tailored alternatives, check out the Everything Vegan Guide for plant-based tips.
Making perfect thumbprint cookies is all about the little details, and with these tips, you’re well on your way to impressing your friends and family. Happy baking!
Time details for Chocolate Thumbprint Cookies
When it comes to baking, timing is everything. For your delicious chocolate thumbprint cookies, here’s what you need to know about preparation and baking:
Preparation time
Get ready for cookie magic! The prep for your chocolate thumbprint cookies only takes about 15-20 minutes. This includes mixing your ingredients and forming those iconic thumbprints.
Baking time
Baking is where your kitchen will be filled with sweet aromas. Each batch bakes for 10-12 minutes, so don’t wander too far!
Cooling and setting time
Once you’ve pulled your cookies from the oven, let them cool for about 10 minutes on the baking sheet. For best results, allow them to set on a wire rack for an additional 10-15 minutes. This waiting will enhance their texture and flavor.
For more tips on baking delicious cookies, check out Food Network or King Arthur Baking. Happy baking!
Nutritional Information for Chocolate Thumbprint Cookies
Calories Per Cookie
When indulging in these delectable chocolate thumbprint cookies, moderation is key. Each cookie packs around 90 calories, making them a sweet treat that won’t completely derail your day. Enjoying them with a cup of coffee or tea is a great way to savor each bite.
Breakdown of Key Nutrients
These delightful cookies aren’t just about sweetness; they also offer a balance of nutrients:
- Fats: Approximately 5 grams, contributing to a satisfying richness.
- Carbohydrates: Around 10 grams, providing a quick energy boost.
- Protein: Each cookie has about 1 gram, helping to keep you feeling fuller longer.
For a low-calorie dessert option, check out this nutrition guide for mindful eating tips. As you whisk up these chocolate thumbprint cookies, remember that a small treat can bring joy without tipping the scale!
FAQs about Chocolate Thumbprint Cookies
Can I freeze chocolate thumbprint cookies?
Absolutely! Chocolate thumbprint cookies freeze beautifully, making them a great option for preparing ahead of time. To freeze, simply place the baked cookies in an airtight container or a zip-top freezer bag, with parchment paper between layers to prevent sticking. They can last in the freezer for about 2-3 months. When you’re ready to enjoy them, just let them thaw at room temperature or pop them in the microwave for a few seconds for a quick warm-up.
What if I don’t have bourbon?
No worries! If you don’t have bourbon or prefer not to use it, you can substitute it with equal parts vanilla extract or a combination of apple cider vinegar and water for a delightful twist. This substitution maintains the essence of the chocolate thumbprint cookies without compromising their rich flavor. The flexibility of this recipe is one of its charms!
How long do these cookies last?
Once baked, your delicious chocolate thumbprint cookies will stay fresh for about a week when stored in an airtight container at room temperature. If you’ve filled them with jam or chocolate ganache, consider consuming them within 3-5 days for the best taste and texture. If you’d like to extend their shelf life a bit, storing them in the fridge can keep them fresh for up to 10 days.
For even more tips on storing baked goods properly, check out expert advice from sources like The Kitchn and Serious Eats. Happy baking!
Conclusion on Chocolate Thumbprint Cookies
The joy of homemade cookies
There’s something truly special about baking chocolate thumbprint cookies in your own kitchen. The delightful aroma fills your home, creating an atmosphere of warmth and nostalgia. These cookies not only satisfy your sweet tooth but also offer a chance to bond with friends or family over a shared treat.
Imagine a cozy evening, laughing and reminiscing while you savor these rich, chocolatey delights. Whether they’re for a celebration or just a simple indulgence, each bite of these cookies evokes joy and comfort. So why not whip up a batch and create your own sweet memories? You may also find inspiration on baking techniques and unique variations at Serious Eats. Happy baking!
PrintChocolate Thumbprint Cookies: Indulgent Treats for Everyone

Delicious and rich Chocolate Thumbprint Cookies filled with creamy chocolate ganache. Perfect for any occasion!
- Prep Time: 20 minutes
- Cook Time: 15 minutes
- Total Time: 35 minutes
- Yield: 12 cookies 1x
- Category: Dessert
- Method: Baking
- Cuisine: American
- Diet: Vegetarian
Ingredients
- 1 cup all-purpose flour
- 1/2 cup unsweetened cocoa powder
- 1/2 teaspoon baking powder
- 1/4 teaspoon salt
- 1/2 cup unsalted butter, softened
- 1/2 cup granulated sugar
- 1/4 cup brown sugar
- 1 teaspoon vanilla extract
- 1 large egg yolk
- 1/2 cup chocolate ganache
Instructions
- Preheat the oven to 350°F (175°C).
- In a bowl, mix flour, cocoa powder, baking powder, and salt.
- In another bowl, cream the butter, granulated sugar, and brown sugar until smooth.
- Add the vanilla and egg yolk; mix well.
- Gradually add the dry ingredients to the wet ingredients and mix until combined.
- Shape the dough into balls and place them on a baking sheet.
- Use your thumb to create an indentation in each ball.
- Fill each indentation with chocolate ganache.
- Bake for 12-15 minutes. Let cool before serving.
Notes
- For a richer filling, use dark chocolate for the ganache.
- These cookies can be stored in an airtight container for up to a week.
Nutrition
- Serving Size: 1 cookie
- Calories: 120
- Sugar: 10g
- Sodium: 50mg
- Fat: 8g
- Saturated Fat: 5g
- Unsaturated Fat: 3g
- Trans Fat: 0g
- Carbohydrates: 15g
- Fiber: 1g
- Protein: 2g
- Cholesterol: 25mg
Keywords: Chocolate Thumbprint Cookies, cookies, baking, dessert