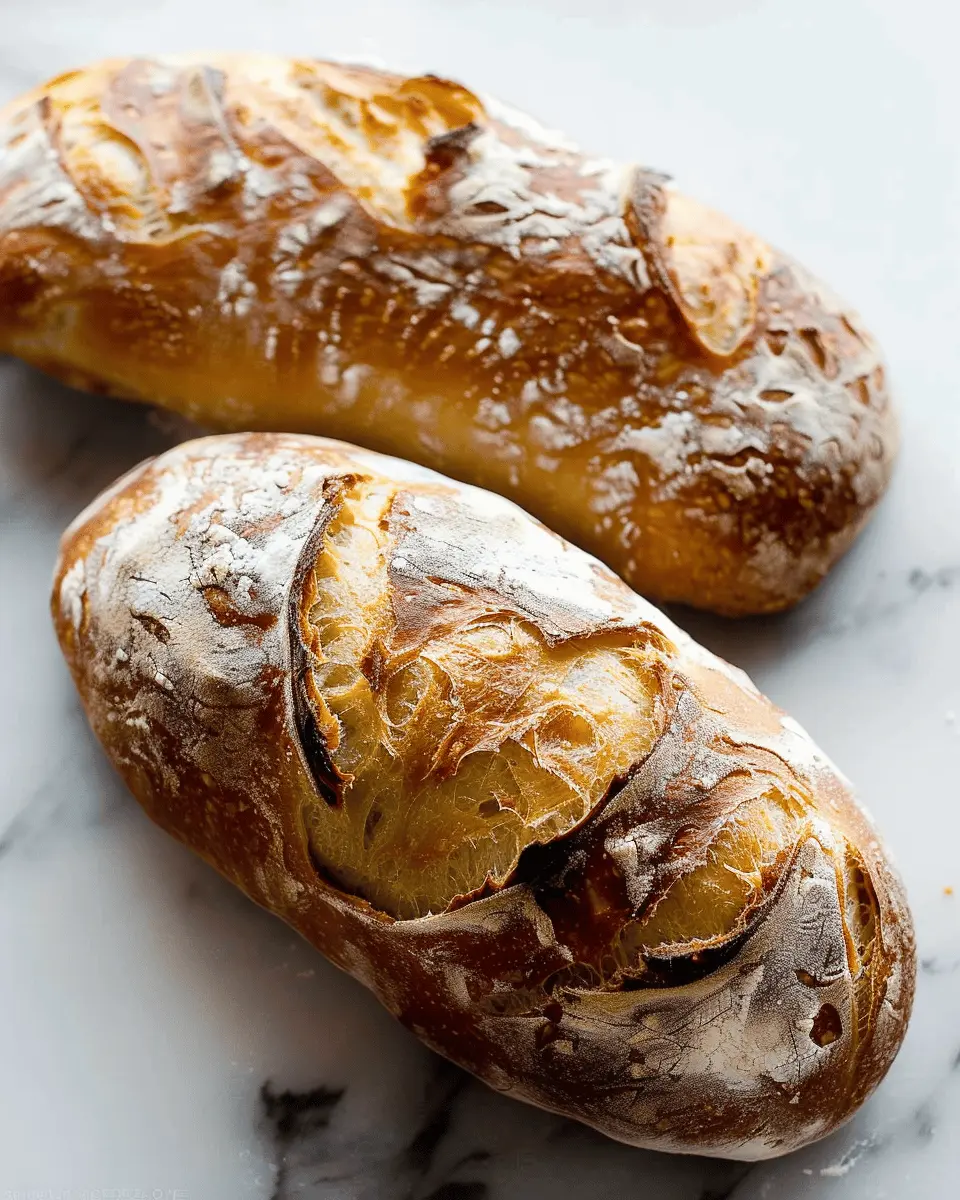
Introduction to Artisan Bread
Artisan bread is more than just a culinary creation; it represents a passion for quality and craftsmanship. As young professionals juggling work, social lives, and passions, you might be wondering if there’s time to embrace baking. Spoiler alert: there is! Making your own artisan bread can be incredibly rewarding, and once you try it, you’ll understand why it’s often considered the best choice.
Why is homemade artisan bread the best choice?
When you think about homemade artisan bread, you might picture warm, crusty loaves, freshly baked and just waiting to be sliced. But the benefits extend much further:
- Control Over Ingredients: You decide what goes in, ensuring everything is fresh and natural. Say goodbye to preservatives and artificial flavors found in store-bought bread.
- Unique Flavors & Textures: You can experiment with different flours, herbs, or even add-ins like cheese and olives, customizing your loaf to suit your taste. The variety of flavors you can achieve is limited only by your imagination!
- Healthier Option: Homemade bread often has fewer calories and more nutrients compared to mass-produced alternatives. Plus, it’s a great source of fiber, especially when you opt for whole grains.
An artisan bread recipe is a fantastic way to impress friends or simply enjoy the satisfaction of creating something from scratch. In fact, studies show that cooking at home can boost your mental well-being and help you develop a healthier relationship with food (source). It’s a win-win!
The process itself can be quite meditative. Picture yourself mixing ingredients, letting the dough rise, and embracing the fragrant aroma wafting through your home. This can easily become a cherished ritual amid your busy week, offering a moment of tranquility.
If you’re ready to embark on this delightful baking journey, grab your apron, and let’s dive into your first artisan bread recipe! From the first knead to the final crusty loaf, every step will bring you closer to mastering a skill that not only fills your kitchen with warmth but also nourishes you and your loved ones.
Ingredients for Artisan Bread
Essential ingredients for perfect artisan bread
When diving into the world of artisan bread, the right ingredients make all the difference. Here’s what you’ll need for your artisan bread recipe:
- High-Quality Flour: Opt for unbleached all-purpose flour or bread flour for that perfect crust and chewy interior.
- Water: Use lukewarm water to help activate the yeast. It’s all about balance—too hot, and you’ll kill the yeast; too cold, and it won’t rise properly.
- Yeast: Active dry yeast is a popular choice. But if you’re adventurous, try sourdough starter for a tangy flavor.
- Salt: Don’t skip this! It enhances the flavor and strengthens the dough’s structure.
For a deeper insight into flour types, check out this guide by King Arthur Baking.
Optional ingredients to elevate your bread
Ready to take your loaf to the next level? Consider adding:
- Olive Oil: A splash can make your bread wonderfully moist.
- Herbs and Spices: Dried rosemary, garlic powder, or even chili flakes can add a unique twist.
- Seeds: Think sesame or poppy seeds for an extra crunch.
Experimenting with different ingredients can really elevate your homemade artisan bread. Enjoy the process, and happy baking!
Step-by-Step Preparation of Artisan Bread
Baking artisan bread at home is not just a culinary experience; it’s an adventure filled with delightful aromas and the satisfaction of creating something from scratch. Whether you’re a rookie in the kitchen or a seasoned chef, this guide will walk you through the essential steps to prepare a loaf of artisan bread that will impress family and friends. Let’s get started!
Gather Your Ingredients
The first step to crafting your perfect loaf is gathering all your ingredients. You’ll need the following:
- Bread flour (about 4 cups) for that wonderful structure
- Water (1 ¾ cups) at room temperature
- Salt (1 tablespoon) to enhance flavor
- Instant yeast (1 teaspoon) for that lovely rise
These straightforward components will yield a beautifully textured bread. It’s essential to use quality ingredients; for a deeper understanding of why ingredient quality matters, check out The Science of Baking.
Mix the Dry Ingredients
Once you have everything ready, it’s time to mix the dry ingredients. In a large mixing bowl, combine your bread flour, salt, and instant yeast. Make sure to whisk them well—this ensures the yeast is evenly distributed throughout the flour. Even though we’re using instant yeast, taking the time to mix is crucial for a uniform rise and taste.
Combine with Water and Form the Dough
Now, gently pour the water into your dry mixture. Stir using a wooden spoon or your hands until the dough comes together. It will seem a bit sticky, which is perfectly fine; it’s all part of the artisan bread recipe. Once combined, let the dough sit for about 5 minutes. This rest period allows the flour to absorb the water, which makes it easier to knead.
Let It Rise – A Crucial Step!
Here comes the magic: let your dough rise! Transfer it to a lightly oiled bowl and cover it with a damp kitchen cloth or plastic wrap. Place the bowl in a warm, draft-free spot and let it rise for 1 to 2 hours, or until it doubles in size. This fermentation process not only develops flavor but also helps create those beautiful air pockets in the bread.
Shape the Dough for Baking
After your dough has risen, it’s time to shape it. Dust a clean surface with a little flour, then gently turn out your risen dough. Using your hands, flatten the dough slightly and fold it over itself a few times. Shape it into a ball or an oblong loaf, depending on your preference. Let it rest for another 30 minutes to allow the dough to relax before baking.
Score and Preheat – Getting Ready to Bake
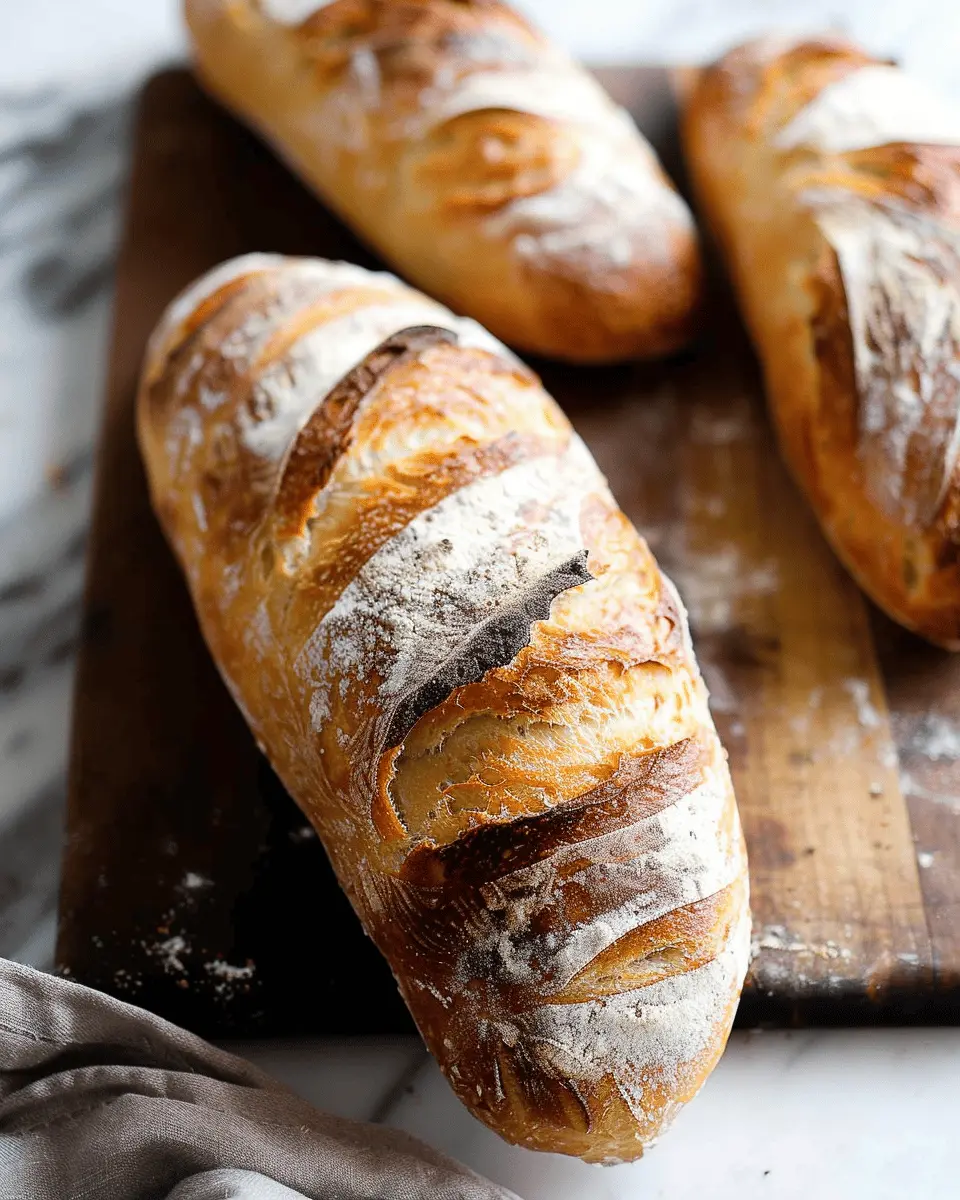
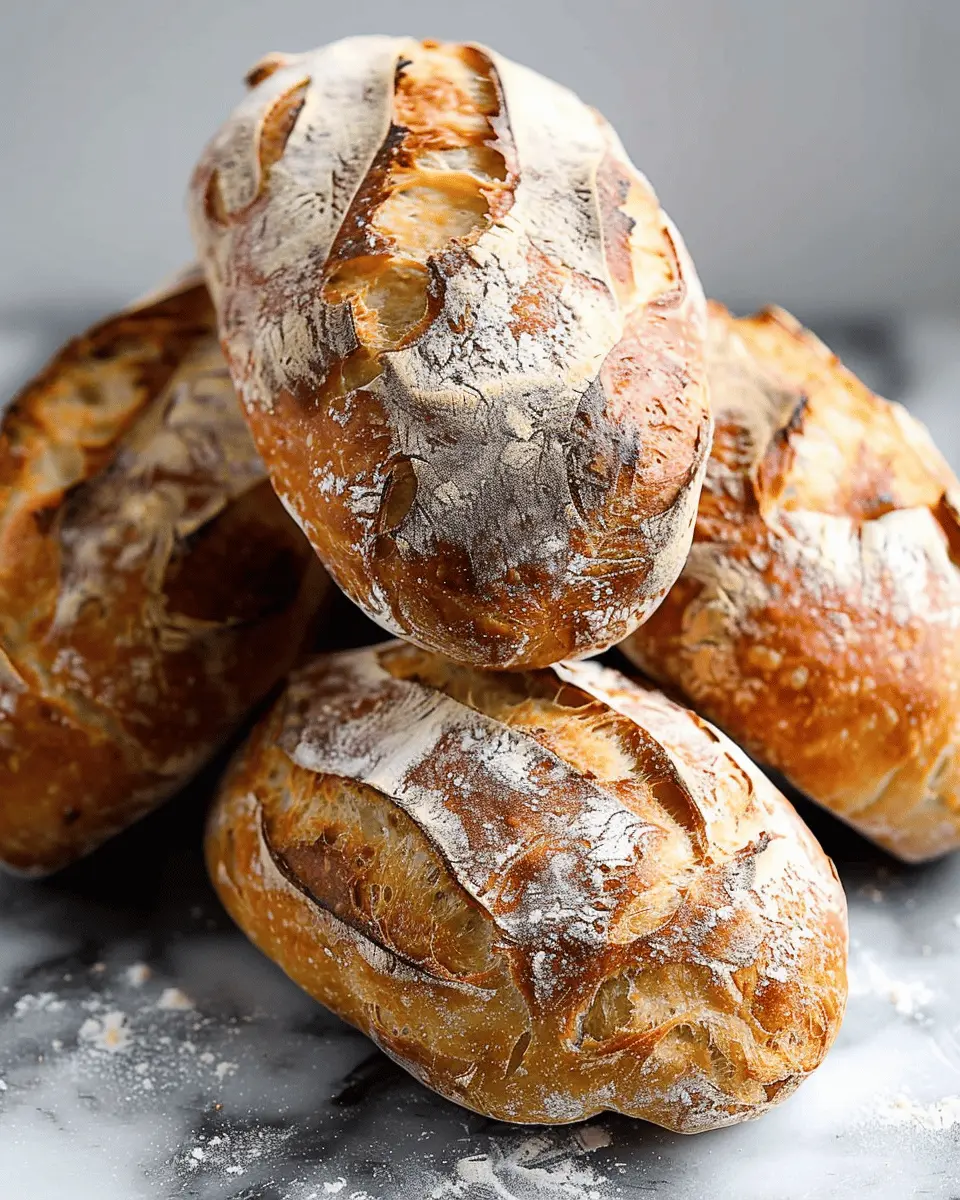
While your dough is doing a final rest, it’s time to prepare your baking environment. Preheat your oven to 450°F (230°C). If you have a baking stone, place it in the oven; if not, a baking sheet will do just fine. Just before putting your dough in the oven, use a sharp knife to score the top. This allows the bread to expand while baking, creating an impressive crust.
Bake the Bread to Perfection
Carefully transfer your dough to the preheated oven. If you’ve got a baking stone, slide it right onto the stone; otherwise, place your loaf on the baking sheet. Bake your bread for 25 to 30 minutes or until it’s golden brown and sounds hollow when tapped. For the best crust, you might want to add steam in the first few minutes of baking. Place a pan filled with hot water on the oven floor to create steam.
Once baked, let your artisan bread cool on a wire rack before slicing. This step ensures the interior finishes cooking and enhances flavor. Enjoy the process and the wonderful taste of your homemade bread!
Baking artisan bread is truly a labor of love; it’s amazing what a little time and effort can yield, isn’t it? Happy baking!
Variations on Artisan Bread
Turning your artisan bread recipe into something unique is part of the fun of baking! Whether you crave a hearty loaf or a fragrant variety, these variations are sure to elevate your baking experience.
Rustic Whole Grain Artisan Bread
Nothing says wholesome like a rustic whole grain artisan bread. Using a mix of whole wheat, rye, or spelt flours gives your bread a nutty flavor and a lovely texture. Here’s how you can make it:
- Flour Blend: Combine whole wheat flour with a bit of all-purpose flour for balance.
- Seeds: Incorporate sunflower, flax, or pumpkin seeds for added crunch and nutrition.
- Hydration: Don’t shy away from using extra water; it makes for a moist crumb!
Why go whole grain? Studies show that whole grains can reduce the risk of various health issues while delivering fiber and essential nutrients. For an excellent resource on the health benefits of whole grains, consider checking out the Whole Grains Council.
Herb-Infused Artisan Bread
If you’re looking to dazzle your taste buds, herb-infused artisan bread is a fantastic way to do that. It’s perfect for serving alongside soups or as a base for gourmet sandwiches. Here’s a quick guide:
- Fresh Herbs: Add chopped rosemary, thyme, or basil to the dough for an aromatic boost.
- Garlic: Incorporating minced garlic brings a savory depth that can make your bread a centerpiece.
- Cheese: Mixing in grated parmesan can lend a delightful umami flavor.
Imagine the delight of pulling a warm loaf from the oven, the fragrant aroma enveloping your kitchen! Experimenting with flavors can make your artisan bread recipe personal and interesting. Don’t hesitate to share your baking adventures and variations with friends—I’d love to hear what you come up with.
Whether you choose whole grain or herb-infused, each loaf is an opportunity to personalize your baking and impress your guests with deliciously hand-crafted bread.
Baking Tips and Notes for Artisan Bread
Common mistakes to avoid
When diving into an artisan bread recipe, it’s easy to slip up. Here are a few common pitfalls:
- Not weighing ingredients: Baking is a science! Use a kitchen scale for precision.
- Ignoring proofing times: Rushing the dough may leave your bread dense. Be patient; good things come to those who wait!
- Inadequate oven heat: Ensure your oven is hot enough before baking. A steamy environment will help you achieve that beautiful crust.
Understanding yeast and its properties
Yeast is the magic behind your artisan bread. Here’s what you should know:
- Activate correctly: For dry yeast, mix it with warm water (not hot!) until frothy, ensuring it’s alive and kicking.
- Different types: There are two main types—active dry and instant. Both work well, but instant yeast can be incorporated directly into your flour.
Curious about the science of yeast? Check out this great guide to yeast for further insights. Remember, a little knowledge goes a long way in perfecting your baking!

Serving Suggestions for Artisan Bread
Pairing Artisan Bread with Spreads
Once you’ve mastered your artisan bread recipe, it’s time to think about what delightful spreads can complement your creation. The options are endless, but here are a few crowd-pleasers:
- Herbed Cream Cheese: A mix of cream cheese and fresh herbs adds a creamy richness, perfect for morning toasts.
- Avocado Smash: Mash ripe avocados with lime juice, salt, and chili flakes for a healthy topping that’s full of flavor.
- Hummus: This versatile spread works beautifully with your bread, adding a nutty, earthy taste. Try different varieties, like roasted red pepper or garlic.
Incorporating Artisan Bread into Meals
Beyond snacks, artisan bread can easily elevate your meals. How about using it for:
- Sandwiches: Layer sliced turkey bacon or chicken ham with fresh veggies and condiments for a gourmet sandwich.
- Bruschetta: Toast sliced artisan bread and top with diced tomatoes, basil, and a drizzle of olive oil for a fresh appetizer.
- Bread Pudding: Use leftover slices to create a savory or sweet bread pudding, turning yesterday’s bread into today’s delicious dessert.
Whether hobbyist or home chef, embracing these ideas will surely enhance your dining experience. For more spread and meal ideas, check out Food Network or AllRecipes for inspiration!
Time Breakdown for Artisan Bread
Preparation Time
The artisan bread recipe starts with about 15 minutes of preparation. This includes gathering your ingredients like flour, water, salt, and yeast, and combining them to form the dough. Be sure to measure everything accurately for the best results.
Rising Time
Next comes the fun part: the rising time. Allow the dough to rise for approximately 3–4 hours, giving it that lovely flavor and texture. For optimal results, you can let it rise slowly in the fridge overnight—a little patience goes a long way!
Baking Time
Once your dough has fully risen, you’ll need about 30–40 minutes for baking. Keep an eye on it to ensure that it develops that beautiful golden crust that we all love.
Total Time
In total, you’re looking at around 4–5 hours from start to finish, not including any chilling time if you opt for an overnight rise. Embrace this time as a moment to unwind; maybe enjoy a cup of coffee or dive into a great book while you wait!
If you’re interested in learning more about the science of bread-making, check out this insightful article on Artisan Bread Baking. It’s a fantastic resource!
Nutritional Facts for Artisan Bread
When you indulge in homemade artisan bread, it’s essential to be aware of its nutritional profile. Let’s break it down:
Calories
A typical serving of artisan bread (about 1 slice) contains approximately 80-100 calories. This makes it a moderate choice for those mindful of their caloric intake.
Carbohydrates
With around 15-20 grams of carbohydrates per slice, this tasty bread offers a quick source of energy. It’s a perfect addition to a balanced meal, especially when paired with proteins and healthy fats.
Protein
Though not a high-protein food, artisan bread provides about 3 grams of protein per slice. Pair it with turkey bacon or chicken ham to create a more protein-rich meal option.
For more details on healthy eating or to explore other nutritious recipes, check out the USDA’s nutritional guidelines or ChooseMyPlate.gov.
FAQs about Artisan Bread
What is artisan bread?
Artisan bread is often characterized by its traditional baking methods, unique flavors, and the use of high-quality ingredients. Unlike mass-produced bread, artisan types usually have a crusty exterior, soft interior, and are made from simple, natural ingredients. The dough is often crafted in smaller batches, allowing for more attention to detail and flavor development. According to the Bread Bakers Guild of America, this craft not only focuses on taste but also on the art of bread-making itself.
How do I store my artisan bread?
To keep your artisan bread fresh, it’s best to store it in a paper bag at room temperature. Avoid plastic bags, as they trap moisture and can make the crust soggy. If you want your bread to last longer, consider freezing it. Simply slice the loaf, wrap each piece in plastic wrap, and store it in an airtight container. When you’re ready to enjoy, just toast or bake it straight from the freezer.
Can I use all-purpose flour instead of bread flour?
Absolutely! While bread flour has a higher protein content, you can use all-purpose flour for your artisan bread recipe. Just keep in mind that the texture may differ slightly, resulting in a softer crust. If you want to improve the rise and chewiness, you might add a bit of vital wheat gluten—about a tablespoon per cup of flour.
What should I do if my dough doesn’t rise?
If your dough fails to rise, first check the yeast. Ensure that it’s fresh and active. Also, factors such as temperature can impact dough rising. Try placing it in a warmer spot, such as an oven turned off but with the light on. If all else fails, don’t fret; your dough can still make delicious flatbreads!
For more tips on baking and managing dough, check out King Arthur Baking for expert advice and resources.
Conclusion on Artisan Bread
Embracing the Joy of Homemade Bread
Baking your own bread is more than just a recipe; it’s an experience that connects you to timeless cooking traditions. With this artisan bread recipe, you’ll find not only satisfaction in creating something delicious but also an opportunity to bring warmth and comfort to your home. The aroma of fresh bread wafting through your kitchen is a delightful perk that can brighten anyone’s day.
Getting hands-on with your ingredients encourages creativity and fosters a deep appreciation for the craft. So, why not invite friends over for a bread-baking session? You’ll enjoy laughter, shared stories, and the incredible taste of what you’ve created together. And remember, every loaf can be a masterpiece of flavor and texture — experiment, and make it your own! For more insights, check out King Arthur Baking for tips and tricks on perfecting your craft.
Printartisan bread recipe: easy steps to homemade deliciousness
Learn how to make artisan bread at home with this easy recipe that guides you through each step for delicious results.
- Prep Time: 5 minutes
- Cook Time: 45 minutes
- Total Time: 18 hours 50 minutes
- Yield: 1 loaf 1x
- Category: Breads
- Method: Baking
- Cuisine: French
- Diet: Vegetarian
Ingredients
- 3 cups all-purpose flour
- 1.5 teaspoons salt
- 1 teaspoon instant yeast
- 1.5 cups warm water
Instructions
- In a large bowl, combine flour, salt, and yeast.
- Add warm water and stir until combined.
- Cover the bowl and let the dough rise for 12-18 hours at room temperature.
- After rising, flour a work surface and transfer the dough, shaping it gently.
- Let it rest for another 1-2 hours.
- Preheat your oven and a Dutch oven inside to 450°F (232°C).
- Transfer the dough to the hot Dutch oven, cover, and bake for 30 minutes.
- Remove the lid and bake for an additional 15 minutes until golden brown.
- Let it cool before slicing.
Notes
- For a crustier loaf, use a large pot with a lid.
- Add herbs or seeds for extra flavor.
Nutrition
- Serving Size: 1 slice
- Calories: 150
- Sugar: 0g
- Sodium: 350mg
- Fat: 1g
- Saturated Fat: 0g
- Unsaturated Fat: 0g
- Trans Fat: 0g
- Carbohydrates: 30g
- Fiber: 1g
- Protein: 4g
- Cholesterol: 0mg
Keywords: artisan bread, homemade bread, easy baking