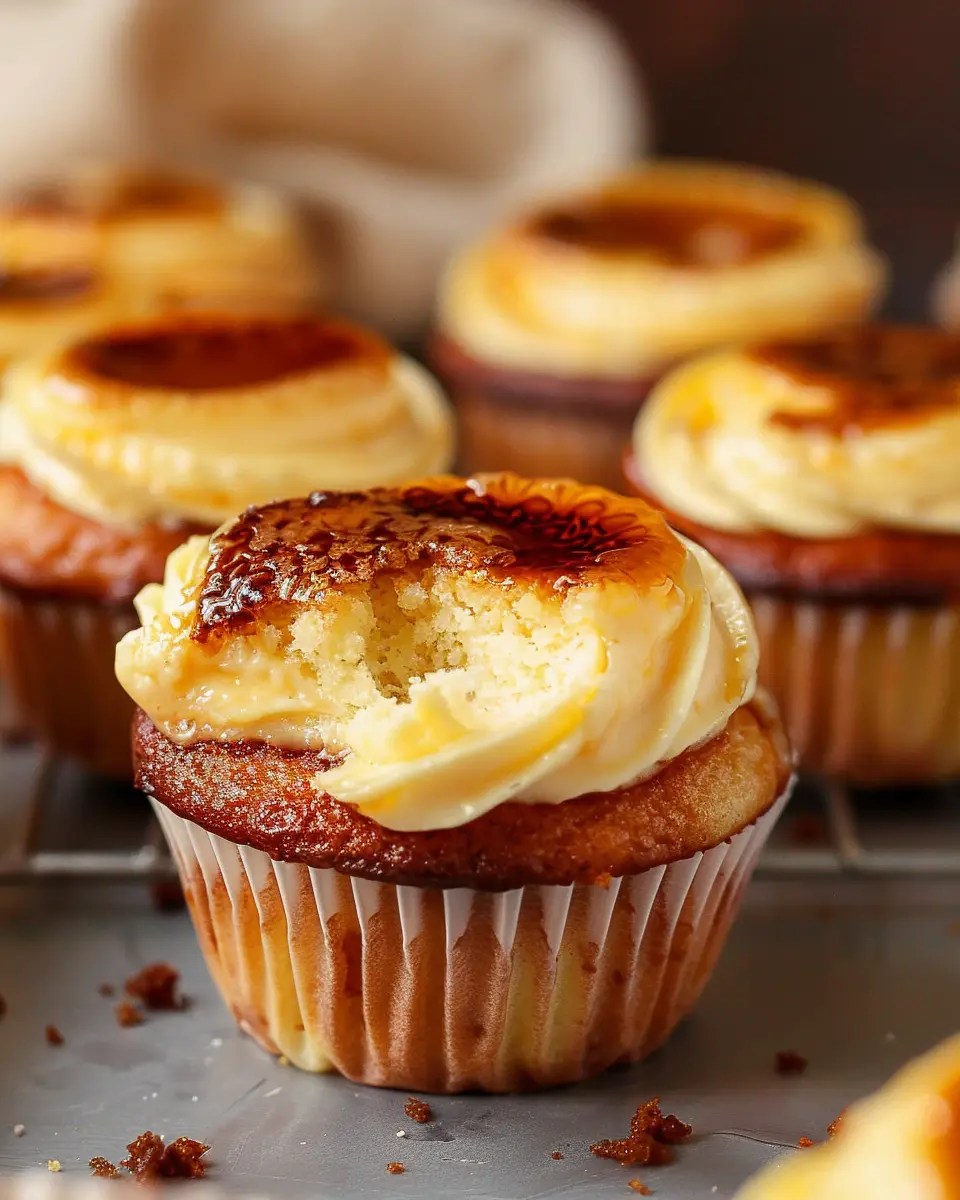
Introduction to Red Velvet Cupcakes
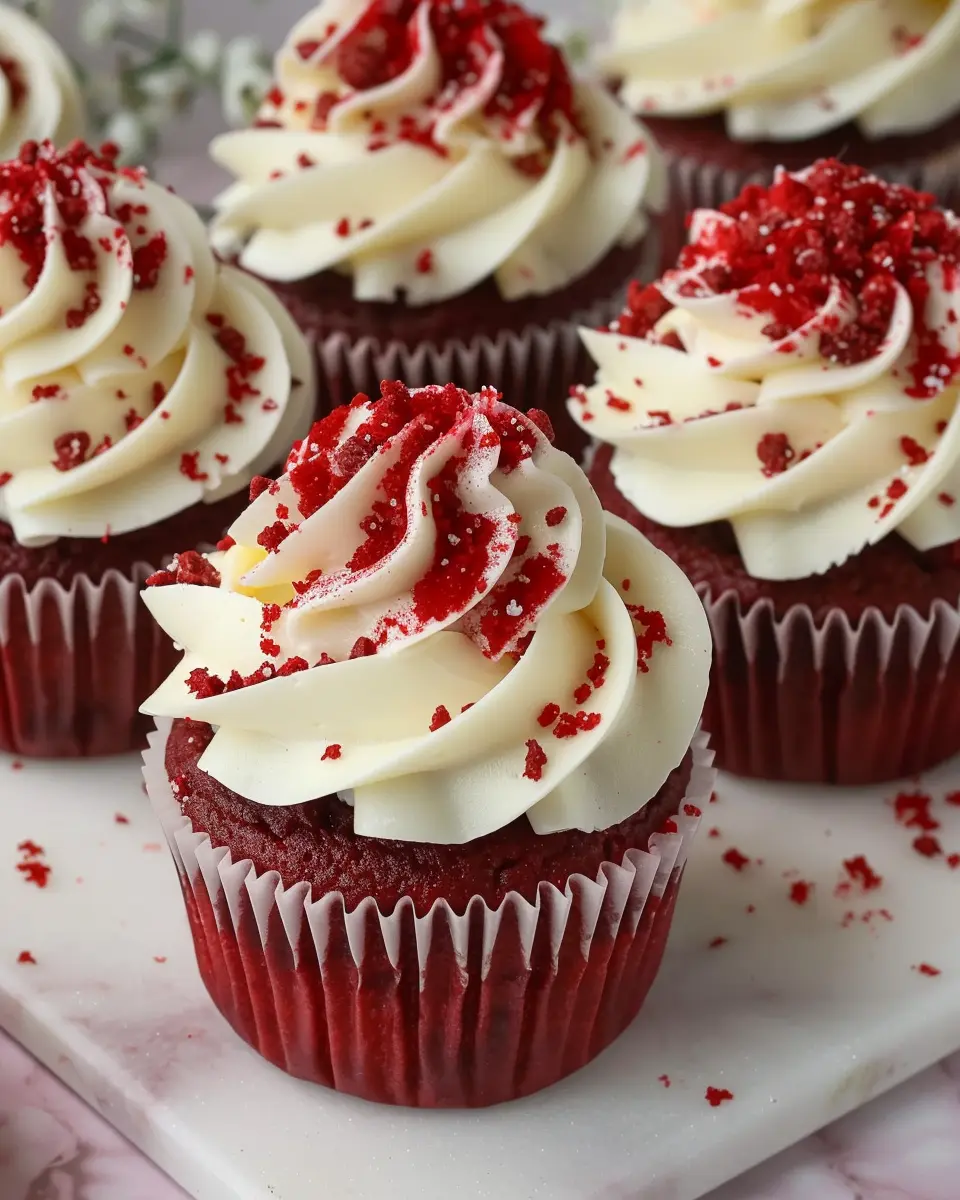
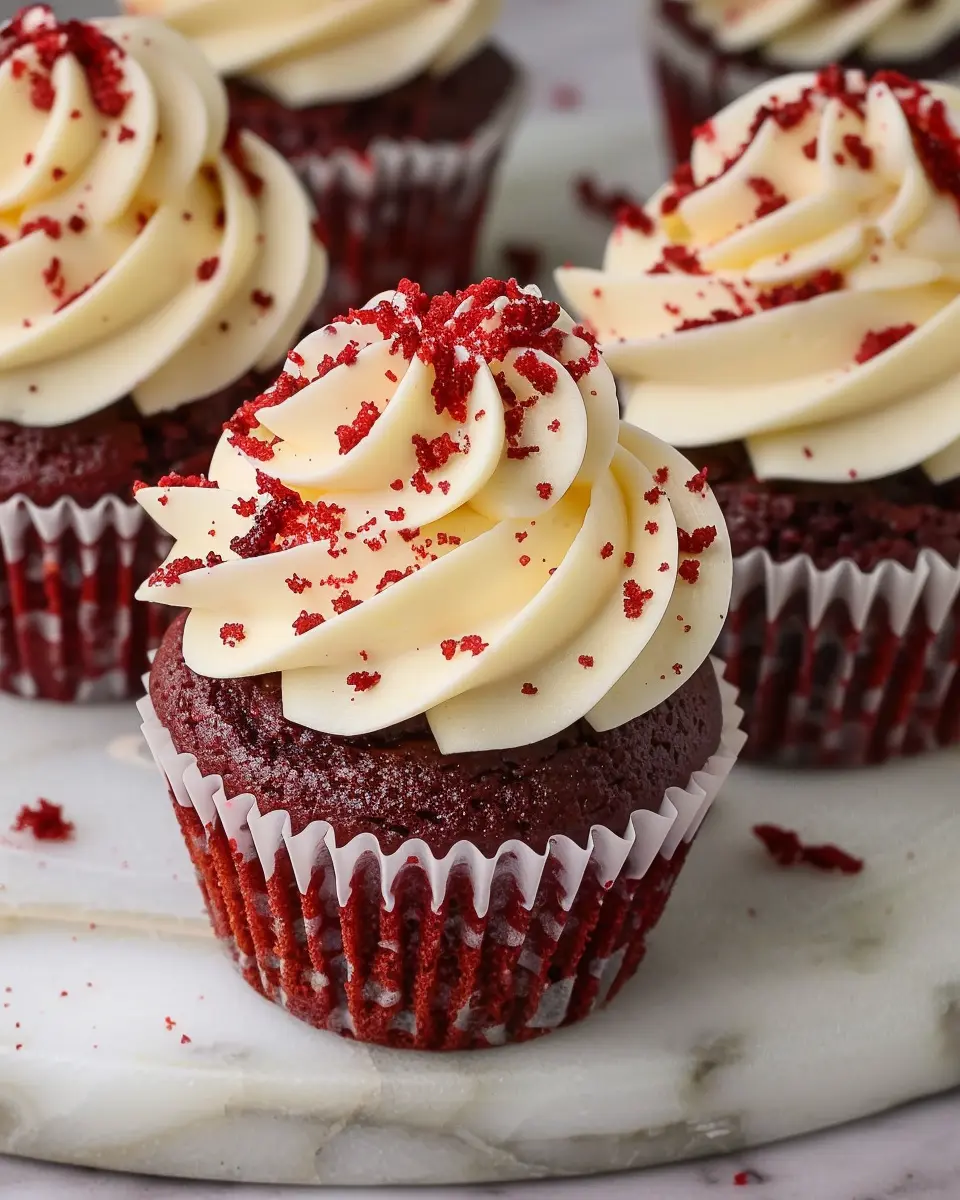
Red velvet cupcakes have a charm all their own, combining the elegance of a classic dessert with a unique flair that makes them irresistible. But what sets these delectable treats apart from other cupcakes? To begin with, the vibrant red color is not just for show. This striking hue originates from the reaction between cocoa powder and acidic ingredients like buttermilk and vinegar. It creates a subtle chocolate flavor that’s truly delightful. The tender, moist texture further elevates the cupcake experience, making each bite feel special.
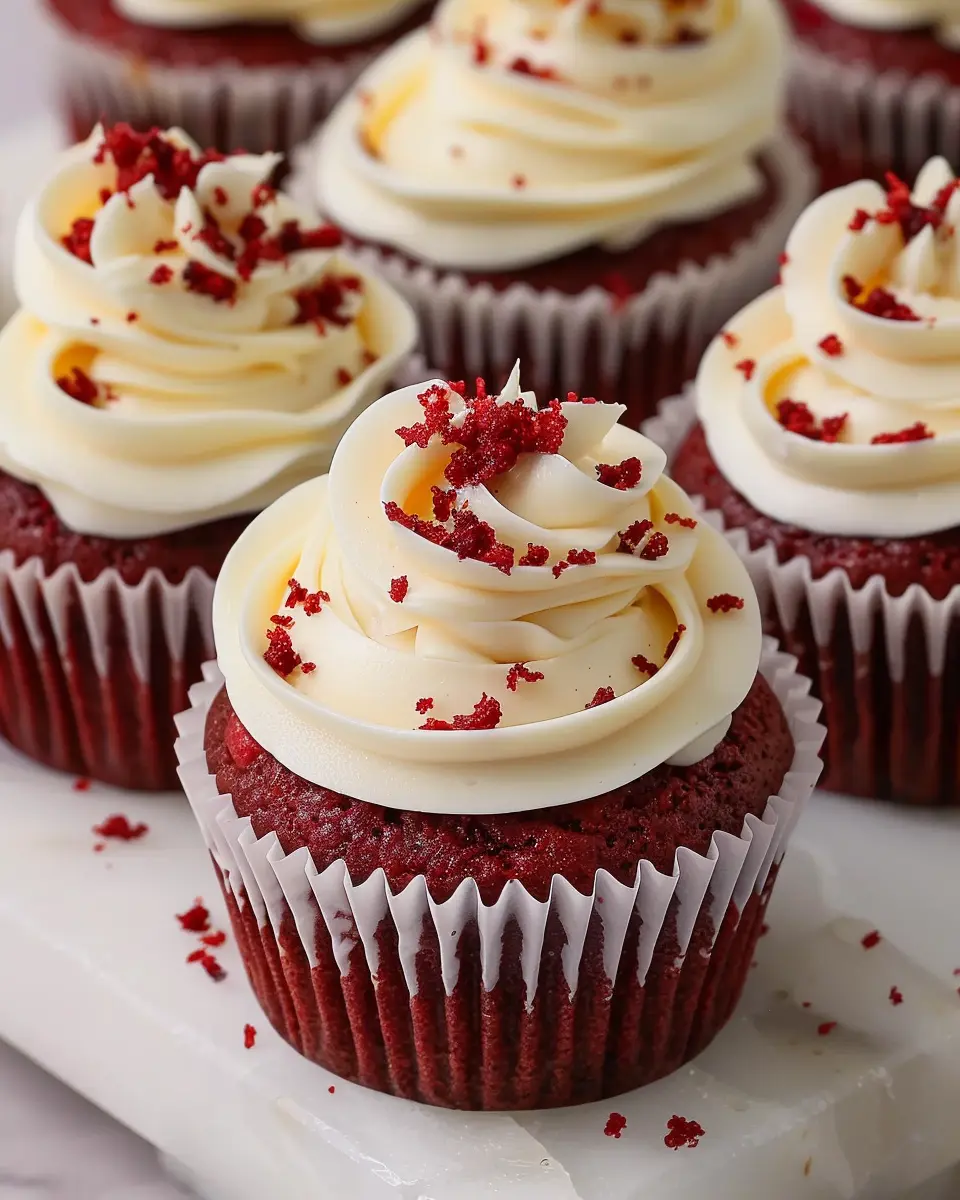
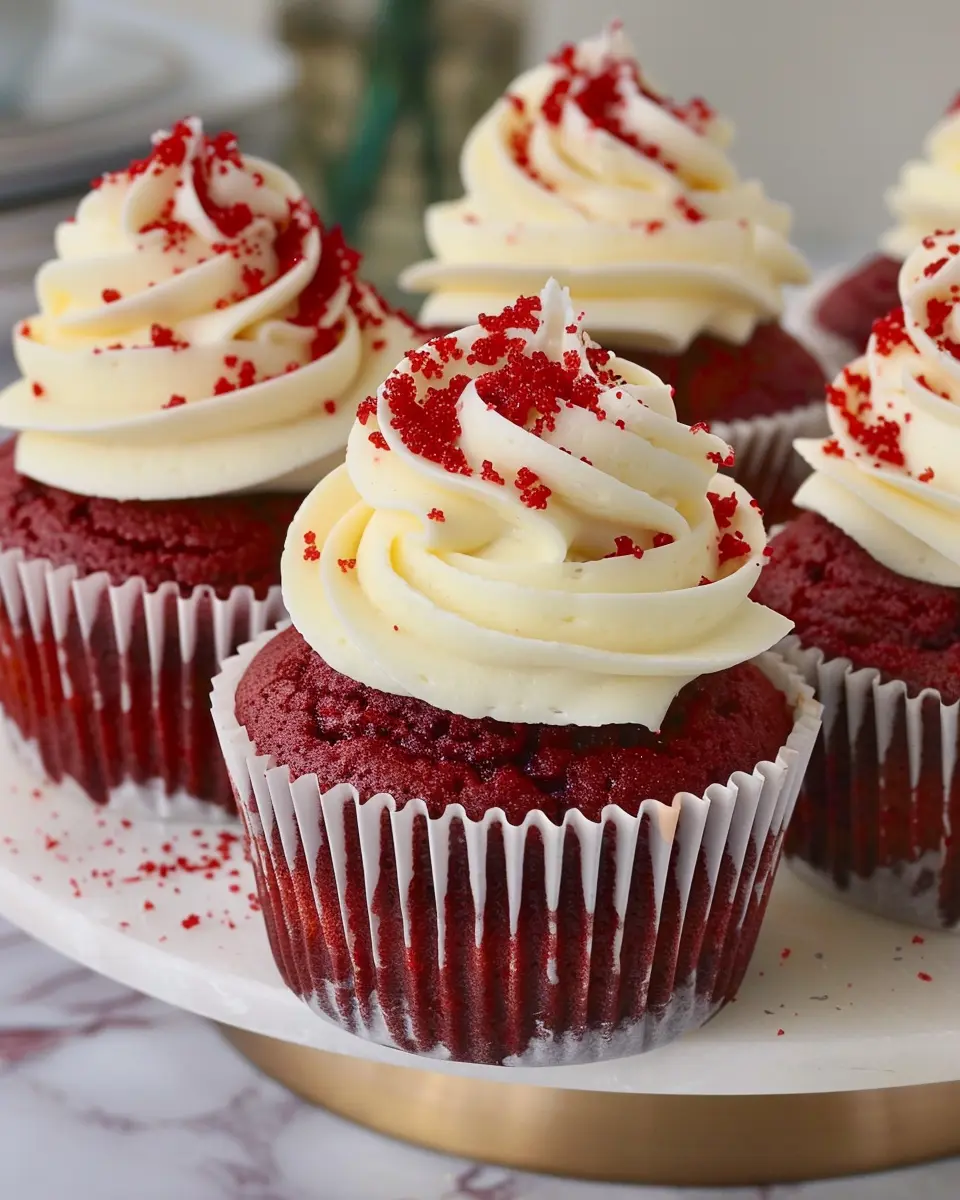
One of the hallmarks of red velvet cupcakes is their signature cream cheese frosting. The creamy, tangy sweetness complements the richness of the cupcake perfectly, offering a balance that leaves your taste buds craving more. According to the American Heart Association, the combination of flavors and textures in desserts can significantly enhance our emotional well-being, making these cupcakes not just a treat, but a mood booster, too!
When it comes to serving, red velvet cupcakes are often the star of the show at special occasions, from weddings to birthdays. Their stunning appearance and delicious flavor are likely to spark conversations. Have you ever been at a gathering where the dessert table steals the spotlight? It’s pretty common, but with these beauties, you’ll be the one to turn heads.
For those interested in diving deeper into the world of baking, exploring the science behind why these ingredients work together could be quite illuminating. For instance, the buttermilk not only adds moisture but also activates the baking soda, creating a fluffier cupcake. If you’re curious about the chemical reactions in baking, check out this informative resource from the USDA!
Lastly, whether you’re a baking novice or a seasoned pro, red velvet cupcakes are accessible and rewarding. There’s something magical about whipping up a batch for your friends or family, watching their faces light up with the first bite. So, are you ready to dive into the wonderful world of red velvet cupcakes?
Ingredients for Red Velvet Cupcakes
When it comes to baking red velvet cupcakes, the joy starts with gathering the right ingredients. Let’s dive into what you’ll need to make your cupcakes deliciously memorable!
Essential ingredients for the sponge
For the foundation of your moist and tender cupcakes, stock up on these essentials:
- All-purpose flour: Provides structure.
- Granulated sugar: Adds sweetness and moisture.
- Baking soda: Helps the cupcakes rise.
- Cocoa powder: Just a hint for that classic flavor.
- Vegetable oil: Keeps them moist—absolutely key!
- Buttermilk: Perfect for that tangy flavor.
- Large eggs: Bind the ingredients together.
- Red food coloring: The star of the show that makes them pop!
- Vanilla extract: Enhances the flavor profile.
Feeling adventurous? Check out how buttermilk benefits baking for even more insights!
Ingredients for the cream cheese buttercream
Now, let’s whip up a smooth and decadent cream cheese buttercream:
- Cream cheese: The heart of your frosting, giving it that luscious taste.
- Unsalted butter: For creaminess and structure.
- Powdered sugar: Sweetness and stability.
- Vanilla extract: Just a splash for depth.
These ingredients come together to create that perfect topping for your red velvet cupcakes. Once you’ve gathered everything, you’re on your way to impressing friends and colleagues with your baking skills! What are you waiting for? Happy baking!
Step-by-Step Preparation of Red Velvet Cupcakes
Creating red velvet cupcakes is a delightful experience that combines rich flavors with a touch of elegance. Whether you’re preparing them for a special occasion or just a cozy night in, this step-by-step guide will help you through the process with ease.
Preheat and Prepare the Baking Tin
Begin by preheating your oven to 350°F (175°C). This ensures that your cupcakes bake evenly and rise beautifully. While the oven is heating, prepare your cupcake tin by lining it with paper liners. This not only adds to the aesthetic appeal but also makes removing the cupcakes a breeze. If you don’t have liners, don’t worry! A light greasing will do just fine.
Cream the Butter and Sugar
In a large mixing bowl, combine 1 cup of unsalted butter (softened to room temperature) and 1 ½ cups of granulated sugar. Using a hand mixer or stand mixer, cream them together until the mixture becomes light and fluffy—this usually takes about 3-5 minutes.
Pro tip: Creaming butter and sugar well is crucial because it introduces air into the mixture, which helps your cupcakes rise nicely during baking. This is an important foundation for any great cupcake recipe.
Incorporate Eggs and Vanilla
Next, add in your eggs—two large ones should do the trick. Make sure to mix well after each addition to ensure the eggs blend thoroughly into the mixture. Then, add in 1 teaspoon of vanilla extract, which will infuse your red velvet cupcakes with that lovely, aromatic flavor. Mix until all the ingredients are well combined and smooth.
Mix in Dry Ingredients and Buttermilk
In a separate bowl, whisk together your dry ingredients: 2 cups of all-purpose flour, 1 tablespoon of cocoa powder, 1 teaspoon of baking soda, and a pinch of salt. Gradually add this dry mixture to your butter mixture, alternating with 1 cup of buttermilk. Start and finish with the flour mixture. It’s totally fine for the batter to have a few lumps; overmixing can lead to tough cupcakes.
Don’t forget the iconic red color! Add about 1 tablespoon of red food coloring, mix until you achieve that vibrant hue. You can adjust the amount if you want a deeper red.
Bake the Cupcakes to Perfection
Once your batter is ready, use an ice cream scoop or a ladle to fill each cupcake liner about two-thirds full. This helps your cupcakes rise without spilling over. Bake them in your preheated oven for about 20-22 minutes, or until a toothpick inserted in the center comes out clean. Keep an eye on them, because overbaking can dry them out.
Make the Cream Cheese Frosting
While your cupcakes cool, it’s time to whip up the luscious cream cheese frosting. In another bowl, beat together 1 cup of softened cream cheese and ½ cup of unsalted butter until smooth. Gradually add 4 cups of powdered sugar and mix until light and fluffy. For a touch of flavor, include 1 teaspoon of vanilla extract.
Expert Tip: If you want a more stable frosting, consider adding a bit of cornstarch to the mix. This helps maintain its shape when you pipe it onto your cupcakes.
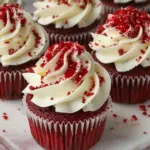
Frost the Cupcakes and Add Decorations
Now for the final, and often the most fun step—frosting your red velvet cupcakes! Use a piping bag with a decorative tip for a professional look, or simply spread the frosting with a knife for a rustic vibe.
Once you’ve frosted each cupcake, you can sprinkle some chocolate shavings or red velvet cake crumbs on top for extra flair. Don’t shy away from some festive decorations! Think about edible glitter or even fresh raspberries to really make your cupcakes pop.
And voilà! Your homemade red velvet cupcakes are ready to be enjoyed. Whether you’re serving them at a party or indulging in a quiet moment with a cup of coffee, these little delights are sure to impress.
For more baking inspiration, consider checking out sites like Baker’s Illustrated or Food Network for tips and recipes that elevate your baking game!
Now, it’s time to savor your delicious creations. Enjoy every bite!
Variations on Red Velvet Cupcakes
Red velvet cupcakes are a delightful treat that can easily be adapted to suit a variety of palates. If you’re looking to elevate your cupcake game, here are some fantastic variations that add a personal touch to this classic dessert.
Red Velvet Cupcakes with a Twist
Why not give your red velvet cupcakes a playful twist? Adding chocolate chunks can create a rich, decadent flavor that perfectly complements the subtle tang of the red velvet. Use semi-sweet or dark chocolate, and fold them into your batter just before baking. The melted chocolate adds a luxurious texture that elevates the entire cupcake experience. Plus, it’s a great way to indulge that chocolate craving without going overboard. For even more creativity, try incorporating a hint of espresso powder; it really brings out the chocolatey notes.
If you’re feeling adventurous, consider caramel swirls. A bit of homemade or store-bought caramel sauce drizzled on top before baking can create a gooey, sweet surprise in every bite.
Red Velvet Cupcakes with Fruit
For a fresh and fruity take, consider adding raspberries or even strawberries to your red velvet cupcakes. Raspberries bring a tart sweetness that contrasts beautifully with the rich chocolate flavor. Simply drop a few fresh raspberries into your batter, or purée them and swirl the fruit throughout for a lovely marbled effect. This not only tastes amazing but also adds a pop of color that’s visually stunning.
Lastly, if you’re aiming for a more tropical flavor, consider mixing in some crushed pineapple. The sweetness and moisture from the pineapple will keep your cupcakes incredibly soft and flavorful.
Feel free to experiment—after all, that’s where the magic happens! For more inspiration, check out Epicurious or Food Network for additional variations and ideas. Happy baking!
Cooking Tips and Notes for Red Velvet Cupcakes
Top tips for achieving the perfect red color
When making red velvet cupcakes, the color is crucial. To ensure that vibrant hue:
- Use quality food coloring: A gel-based or liquid dye often works best. Brands like Wilton or Americolor offer rich colors that keep their brightness.
- Don’t skimp on cocoa powder: The right amount of cocoa powder can enhance the red color. Use unsweetened cocoa for best results; it’s key to balancing the flavors while boosting the color.
Common mistakes to avoid
As you dive into making these delicious cupcakes, keep these pitfalls in mind:
- Overmixing batter: This can lead to dense cupcakes rather than the soft, airy texture you desire.
- Incorrect oven temperature: Ensure your oven is properly preheated. An unreliable oven can lead to uneven baking, affecting both texture and color.
Baking is all about practice and patience, so don’t hesitate to refer to reputable sources like King Arthur Baking for additional guidance and tips. You’ll soon master these tasty red velvet cupcakes!
Serving Suggestions for Red Velvet Cupcakes
Best pairings for red velvet cupcakes
Red velvet cupcakes are not just a treat but a blank canvas for flavors! They pair beautifully with:
- Cream Cheese Frosting: The classic choice, offering a tangy contrast to the sweetness.
- Fresh Berries: Strawberries or raspberries add a vibrant color and a refreshing tartness.
- Nutty Wonders: Chopped walnuts or pecans provide a delightful crunch that elevates the dessert.
- Soft Drinks: Consider serving with a sparkling lemonade or an iced caramel macchiato for a refreshing sip.
These combinations not only complement the rich flavor of red velvet cupcakes but also create an exciting mix of textures and tastes that your guests will love!
Presentation ideas for special occasions
Make your red velvet cupcakes the centerpiece of your gathering. Here are a few stylish tips:
- Festive Liners: Use themed cupcake liners that match the occasion – think heart designs for Valentine’s Day or vibrant colors for summer parties.
- Decorative Stands: Elevate your display with tiered cake stands. This adds height and draws attention.
- Edible Decorations: Fresh mint leaves or edible flowers on top can transform a simple cupcake into an elegant dessert.
With these presentation ideas, your cupcakes will not only taste delicious but also look stunning! For more inspiration, check out The Spruce Eats for creative decorating ideas.
Time Breakdown for Red Velvet Cupcakes
Preparation Time
Getting your kitchen ready for these delightful red velvet cupcakes takes about 20 to 25 minutes. Gather all your ingredients first—it saves time later! Think about using a mixer for smooth batter.
Baking Time
Once your cupcakes are in the oven, you’ll need to wait for 18 to 20 minutes while they bake to perfection. It’s the perfect moment to tidy up or plan your frosting strategy (cream cheese, anyone?).
Total Time
In less than an hour, you can have a batch of moist, vibrant red velvet cupcakes ready. With both prep and baking time combined, you’ll find that it’s a short investment for delightful cupcakes that steal the show. Want more tips? Check out this guide for perfecting your baking skills!
Nutritional Facts for Red Velvet Cupcakes
When indulging in red velvet cupcakes, it’s good to know what you’re treating yourself to. Let’s break down the details.
Calories per cupcake
Each red velvet cupcake is approximately 300 calories, making it a bit of a sweet commitment! If you’re enjoying one as a dessert, keep this in mind.
Sugar content
With around 20 grams of sugar per cupcake, these treats certainly satisfy a sweet tooth. Moderation is key, especially if you’re mindful of your daily sugar intake.
Nutritional benefits of key ingredients
- Cocoa powder: Rich in antioxidants, it’s known to improve heart health.
- Buttermilk: Provides calcium and protein, supporting bone health and muscle maintenance.
- Vegetable oil: Offers healthy fats that can boost energy levels.
For more about the nutritional aspects of baking, you can check out resources like Healthline for a deeper dive into the benefits of baking ingredients.
Enjoy those red velvet cupcakes, mindful of balance and savor every delightful bite!
FAQs about Red Velvet Cupcakes
Why is buttermilk important in red velvet cupcakes?
Buttermilk isn’t just a moisture booster; it plays a crucial role in the flavor profile of red velvet cupcakes. The tanginess of buttermilk balances the sweetness and enhances the cocoa flavor, creating that quintessential, rich taste. Additionally, the acidity in buttermilk reacts with baking soda, helping to achieve a tender crumb. For a deep dive into the science behind baking, check out this resource from King Arthur Baking.
Can I make these cupcakes gluten-free?
Absolutely! You can create delicious gluten-free red velvet cupcakes by substituting regular flour with a gluten-free all-purpose blend. Just make sure the blend contains xanthan gum to replicate the structure provided by gluten. Many brands, like Bob’s Red Mill and Cup4Cup, create excellent options that you can use without any issues. Your guests won’t even notice a difference!
How should I store leftover red velvet cupcakes?
To keep your leftover red velvet cupcakes tasting fresh, store them in an airtight container at room temperature for up to three days. If you’d like to extend their shelf life, consider refrigerating them, but remember to allow them to come to room temperature before serving, as cold cupcakes can lose some of their delightful flavor. For longer storage, you can freeze them! Just wrap each cupcake tightly in plastic wrap, then place them in a freezer bag. When you’re ready to enjoy, thaw them overnight in the fridge, and voila! You’ve got freshly delightful cupcakes again.
Feel free to drop any other questions you have in the comments! We love connecting with fellow baking enthusiasts.
Conclusion on Red Velvet Cupcakes
Final thoughts on enjoying homemade red velvet cupcakes
In conclusion, red velvet cupcakes are a delightful treat that brings a touch of elegance to any occasion. Whether you’re celebrating a special event or simply indulging in a moment of self-care, these cupcakes are sure to impress. The rich, velvety texture combined with the tangy cream cheese frosting creates an unforgettable flavor experience.
Remember, the joy of baking is not just in the outcome but in the process. So gather your friends or family, and turn this recipe into a fun-filled baking party! If you’re curious about baking science, check out King Arthur Baking for more tips and tricks. Happy baking!
PrintRed Velvet Cupcakes: Decadent Treats for Home Baking Bliss
Indulge in the rich, velvety taste of red velvet cupcakes, perfect for any occasion.
- Prep Time: 15 minutes
- Cook Time: 20 minutes
- Total Time: 35 minutes
- Yield: 12 cupcakes 1x
- Category: Dessert
- Method: Baking
- Cuisine: American
- Diet: Vegetarian
Ingredients
- 1 1/2 cups all-purpose flour
- 1 cup granulated sugar
- 1 teaspoon baking soda
- 1 teaspoon cocoa powder
- 1 teaspoon salt
- 1 cup vegetable oil
- 1 cup buttermilk, room temperature
- 2 large eggs
- 2 tablespoons red food coloring
- 1 teaspoon vanilla extract
- 1 teaspoon white vinegar
Instructions
- Preheat the oven to 350°F (175°C) and line a muffin tin with cupcake liners.
- In a large bowl, whisk together the flour, sugar, baking soda, cocoa powder, and salt.
- In another bowl, mix the vegetable oil, buttermilk, eggs, food coloring, vanilla extract, and vinegar.
- Combine the wet and dry ingredients, stirring until just mixed.
- Divide the batter evenly among the cupcake liners.
- Bake for 18-20 minutes, or until a toothpick comes out clean.
- Let cool before frosting.
Notes
- For a cream cheese frosting, soften cream cheese and butter, then add powdered sugar and vanilla.
- The food coloring can be adjusted to achieve your desired shade of red.
Nutrition
- Serving Size: 1 cupcake
- Calories: 200
- Sugar: 15g
- Sodium: 200mg
- Fat: 8g
- Saturated Fat: 2g
- Unsaturated Fat: 5g
- Trans Fat: 0g
- Carbohydrates: 30g
- Fiber: 1g
- Protein: 2g
- Cholesterol: 50mg
Keywords: red velvet cupcakes, baking, dessert