Introduction to Chocolate Dessert Boards
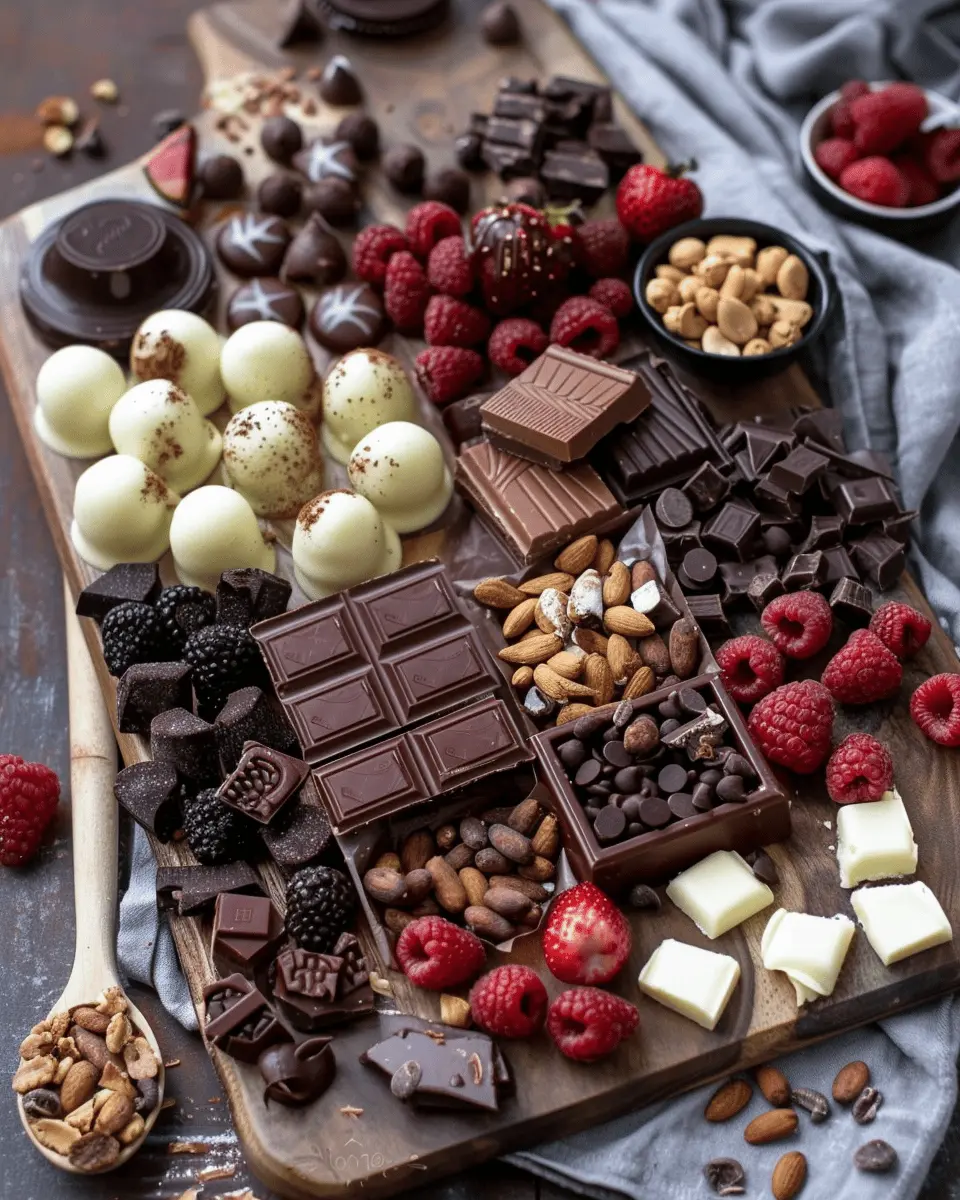
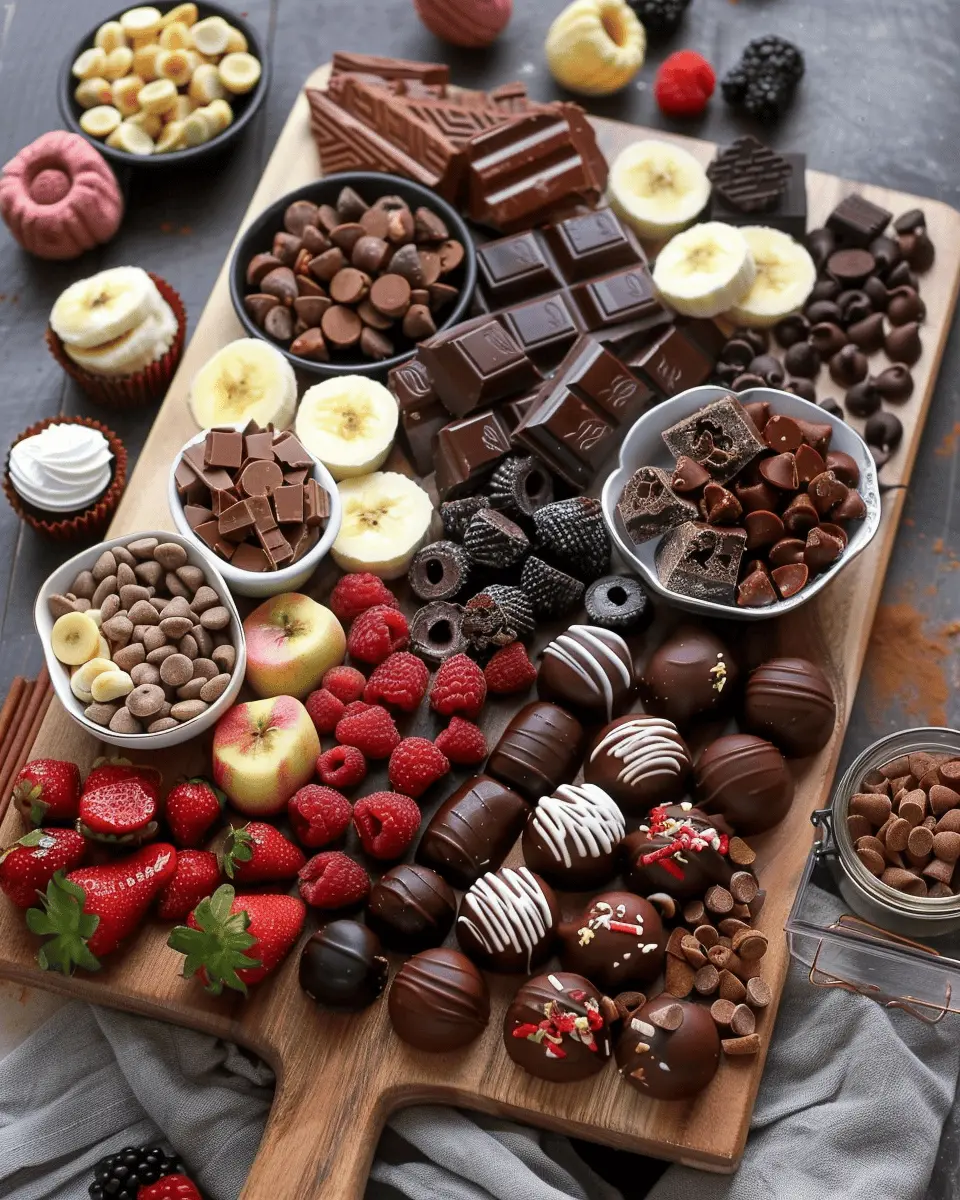
Creating a chocolate dessert board is an exciting way to elevate any gathering, from casual get-togethers to more elaborate celebrations. But what exactly is a chocolate dessert board? Picture this: a beautiful, artfully arranged platter brimming with various chocolate delights—think rich chocolate truffles, creamy chocolate mousse, and assorted chocolate bars, combined with fruits, nuts, and unique toppings. It’s a feast for the eyes and the taste buds!
What Makes a Chocolate Dessert Board So Special?
The beauty of a chocolate dessert board lies in its versatility. You can customize it to fit any occasion or personal preference, making it an effortless yet impressive centerpiece. It’s also a great conversation starter, allowing guests to mingle as they explore the sweet offerings you’ve curated. Whether you’re hosting a birthday party, a movie night, or simply indulging after a long week, a chocolate dessert board can bring a sense of celebration to the moment. According to Food52, dessert boards have become a trending way to serve dessert, as they encourage sharing and trying different flavors.
Why You Need One at Your Next Event
If you’re wondering why you should include a chocolate dessert board at your next event, consider these points:
- Visual Appeal: A well-crafted board is not just about taste; it’s an eye-catching display that can enhance your table setting.
- Interactive Experience: Guests love to pick and choose their favorites. It creates a fun, communal atmosphere where everyone can try different flavors and combinations.
- Easy to Assemble: With a little prep, you can assemble a stunning board in no time, leaving you more space to enjoy the event.
In a world filled with meal prep and takeout, stepping up your dessert game with a chocolate dessert board is a delightful way to share the love of chocolate with friends and family. So, are you ready to dive into the world of chocolate delights? Grab your favorite chocolate ingredients, and let’s get crafting!
Ingredients for a Chocolate Dessert Board
Essential items for a delicious chocolate dessert board
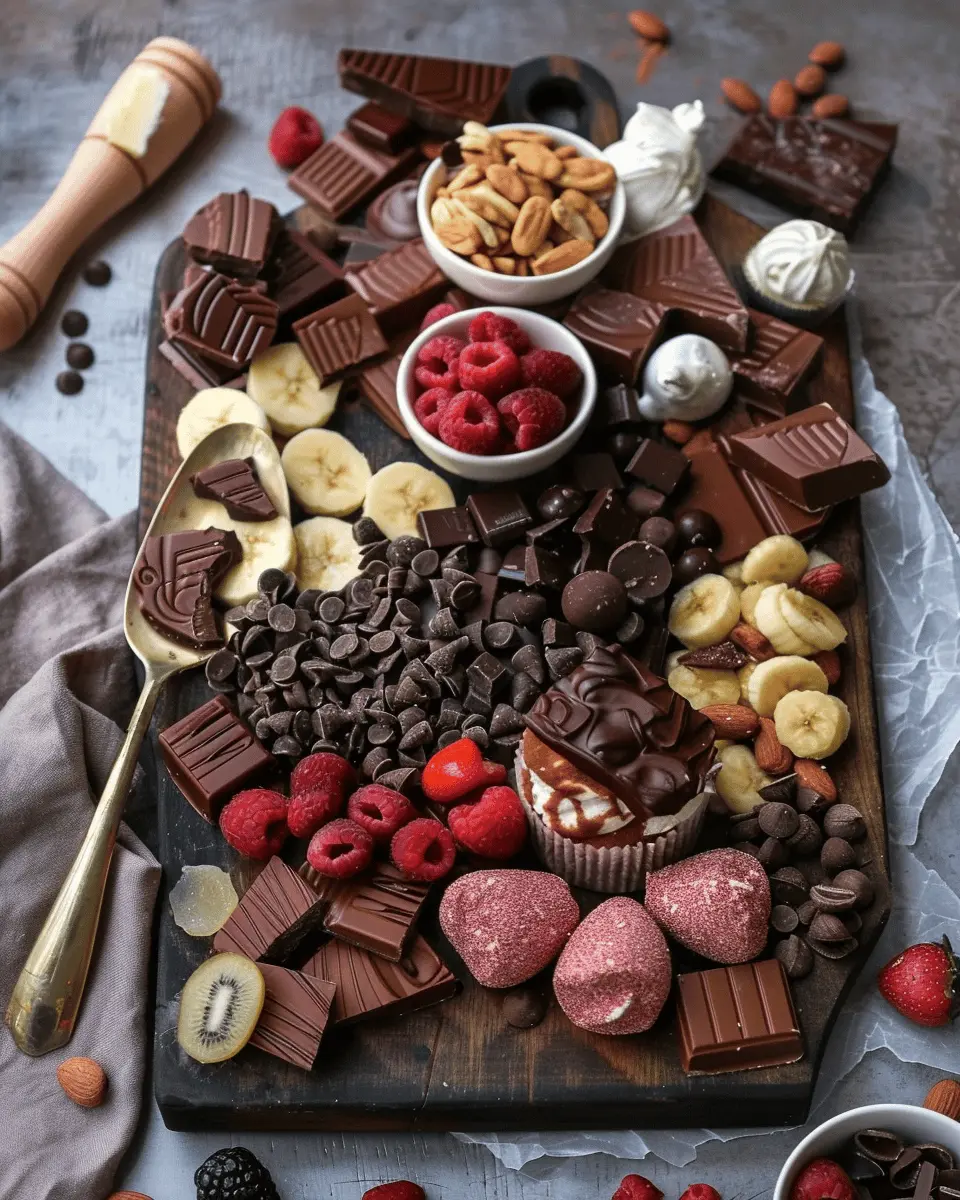
Creating a chocolate dessert board is a delightful way to indulge your sweet tooth and impress your guests. Start with some rich, dark chocolate and creamy milk chocolate. Don’t forget various chocolate treats, such as chocolate-covered pretzels, truffles, and chocolate-peanut butter cups. Adding fresh fruits like strawberries and bananas not only enhances the aesthetic but also balances the sweetness with their natural tartness.
- Dark chocolate
- Milk chocolate
- Chocolate-covered pretzels
- Chocolate truffles
- Fresh strawberries
- Banana slices
Optional treats to customize your board
The beauty of a chocolate dessert board is its versatility. You can easily customize it to suit your cravings and preferences. Consider including flavored marshmallows, nuts like almonds or pecans, and even drizzles of caramel or nut butter for added flair. You could also throw in some crunchy snacks like granola or caramel popcorn for variety.
- Flavored marshmallows
- Nuts (almonds, pecans)
- Caramel drizzle
- Granola or caramel popcorn
By mixing and matching these ingredients, you can create a stunning display that looks as good as it tastes. So, what will you add to your ultimate chocolate board?
Preparing Your Chocolate Dessert Board
Creating a chocolate dessert board is not only delightful, but it can also be a cherished centerpiece for gatherings. Let’s dive into the steps you need to take to prepare an inviting and delicious dessert board that will impress your guests and satisfy any sweet tooth.
Make the chocolate ganache
First off, we can’t overlook the liquid gold of a dessert board—chocolate ganache. This silky mixture of chocolate and cream can elevate your board to new heights. Here’s a quick guide on how to make the perfect ganache:
- Ingredients: Use equal parts high-quality chocolate (dark or milk, depending on your preference) and heavy cream.
- Method:
- Chop your chocolate into small pieces and place it in a heatproof bowl.
- Heat the cream in a saucepan until it’s steaming, but not boiling.
- Pour the hot cream over the chocolate and let it sit for a few minutes.
- Stir gently until smooth. If you’d like to add flavor, consider incorporating vanilla extract or a dash of sea salt.
This ganache can be used as a dipping sauce or drizzled over other components on your chocolate dessert board.
Create the chocolate truffles
Next up, let’s whip up some homemade chocolate truffles. They’re surprisingly simple to make and add a personal touch.
- Basic truffle recipe:
- Use the leftover ganache from earlier. Allow it to cool and then scoop it out into small balls using a melon baller or spoon.
- Roll them in cocoa powder, finely chopped nuts, or shredded coconut for an elegant finish.
These delightful bites can be made ahead of time, so feel free to get creative with flavors and coatings. Your board won’t just look good; it’ll taste heavenly too! For additional inspiration, check out this guide on how to customize your truffles.
Arrange your nuts and chocolates in bowls
Don’t underestimate the power of presentation! For your chocolate dessert board, divide various types of nuts and chocolates into charming little bowls. This not only keeps things tidy but also enhances visual appeal.
-
Nuts: Consider using a mix of almonds, walnuts, and pecans. They provide a satisfying crunch and a nice contrast to the soft textures of the ganache and truffles.
-
Chocolates: Include an assortment of chocolates—think chocolate-covered pretzels, caramel-filled chocolates, or even specialty chocolate bars sliced into pieces. This variety will create wonderful textures and flavors for your guests to explore.
Style your fruit and brownie bites on the board
Incorporating fruit adds freshness and color to your chocolate dessert board. Choose fruits that complement chocolate well, such as strawberries, raspberries, or even slices of banana.
- Brownie bites: Don’t forget the brownies! Cut them into bite-sized pieces for easy serving. Arrange these alongside your fruits in a visually appealing way. Intermixing textures and colors keeps the board exciting and inviting.
Complete your board with final touches
To wrap everything up, consider a few final touches to elevate your chocolate dessert board:
- Garnish: Fresh mint leaves not only look beautiful but provide a refreshing taste to cleanse the palate.
- Serving accessories: Add small spoons or toothpicks beside the bowls to make it easy for guests to sample different items.
Finally, place your masterpiece in the center of the table and watch as your friends and family marvel at your epic chocolate spread!
Getting ready for your next gathering? A chocolate dessert board is your ticket to a flavorful and fun evening. With a little creativity and care, you’ll create a dessert station that’s not only delicious but also an enticing visual treat. Happy indulging!
Variations on the Chocolate Dessert Board
Seasonal Chocolate Dessert Boards for Holidays
When it comes to creating a captivating chocolate dessert board, inspiration can strike from the seasons. For instance, during the winter holidays, consider using rich dark chocolates, peppermint bark, and festive treats like gingerbread cookies. You can create a cozy atmosphere by incorporating seasonal fruits such as citrus or pomegranates for a vibrant contrast.
For spring, think pastel hues. Incorporate white chocolate, fresh berries, and floral-inspired desserts like lavender-infused chocolates. This provides a light, cheerful aesthetic perfect for Easter celebrations or spring gatherings. Don’t forget to check out vibrant decorating ideas on platforms like Pinterest to really capture the essence of the seasons.
Themed Chocolate Dessert Boards for Parties
Themed chocolate dessert boards are an increasingly popular way to elevate any gathering. Planning a movie night? Incorporate chocolate-covered popcorn, movie-themed chocolates, and fun candy choices that match your film selection. If you’re hosting a birthday bash, tailor the board around the guest of honor’s favorite flavors and colors for a personal touch.
Another fun idea is to create a “chocolate around the world” board. Feature chocolates from different countries—think Swiss, Belgian, and even some local artisanal options. Pair these with international snacks like Turkish delight or Italian biscotti. Not only does this make for a visually appealing board, but guests also get to experience a mini culinary tour in the comfort of your home.
By exploring these variations, you can easily tailor your chocolate dessert board to fit any occasion, making it both delicious and memorable!
Cooking Tips and Notes for Chocolate Dessert Boards
Pro tips for prepping in advance
Creating a stunning chocolate dessert board can elevate any gathering. To save time and reduce stress, consider prepping components in advance.
- Choose Your Ingredients: Start by selecting a variety of chocolates—dark, milk, and white.
- Fruit and Nuts: Wash and cut fruits like strawberries and apples the night before. Store them in airtight containers to keep them fresh.
- Plan Your Layout: Have a rough idea of your board design. This helps you visualize how much of each ingredient you’ll need, ensuring balance.
If you’re looking for more guidance on how to arrange your board, check out this charcuterie board inspiration for some fun ideas!
Tips for maintaining freshness of ingredients
The last thing you want is wilted fruit on your chocolate dessert board. To maintain freshness, follow these tips:
- Cool Storage: Keep your ingredients in the refrigerator until it’s time to serve.
- Layer Wisely: Place chocolate items on the board last to prevent melting due to heat from the room.
- Airtight Friends: Use cling wrap to cover any leftovers, sealing in that delightful freshness for your next get-together.
By proactively preparing and storing ingredients, you’ll ensure a delectable experience that keeps everyone coming back for more!
Serving Suggestions for Your Chocolate Dessert Board
How to Present Your Chocolate Dessert Board
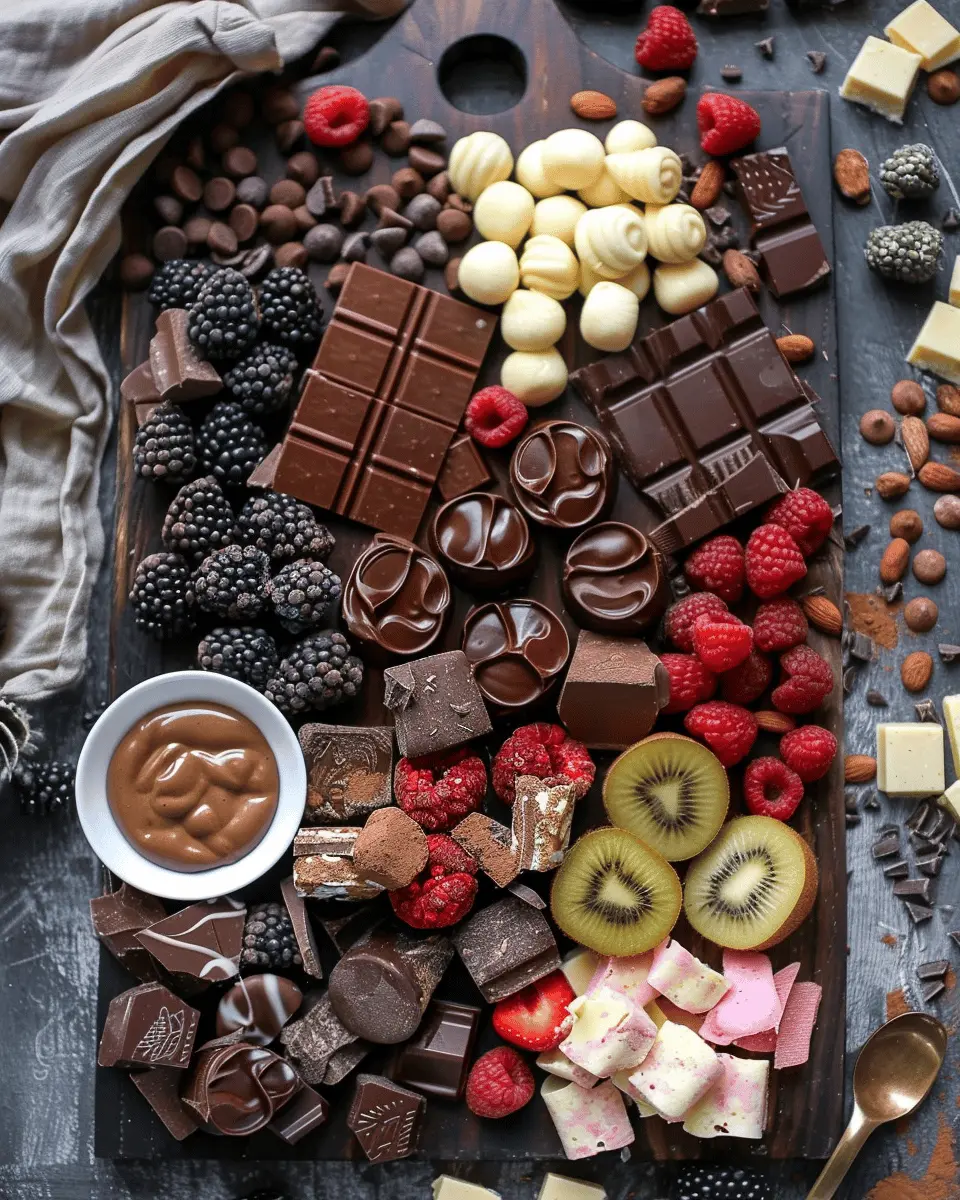
Creating a stunning chocolate dessert board is about more than just taste—it’s also an art form! Start with a large, decorative board or platter and arrange your chocolate pieces in a visually appealing manner. Consider grouping different textures and flavors together; for example, pair creamy milk chocolate with crunchy nuts for contrast. Don’t forget to add slices of fresh fruit like strawberries or bananas for a pop of color! For an extra touch, garnish with edible flowers or mint leaves, which can elevate the presentation to a whole new level.
Best Occasions for Serving
Your delicious chocolate dessert board is perfect for a variety of occasions. Consider serving it at:
- Birthday parties: Guests of all ages will adore it!
- Game nights: It’s a fun and interactive way to enjoy sweets.
- Movie marathons: Your friends can snack while binge-watching.
- Bridal showers: Pair it with non-alcoholic drinks like sparkling water or lemonade.
Tailoring your board to the event ensures it becomes a memorable centerpiece!
Time Breakdown for Preparing a Chocolate Dessert Board
When you’re gearing up to create a stunning chocolate dessert board, knowing how to manage your time wisely is essential. Here’s a quick breakdown to help you plan efficiently:
Preparation Time
For your chocolate dessert board, set aside about 30 minutes for preparation. This includes chopping fruits, slicing cheeses (if you’re adding them), and arranging your chocolates. The beauty lies in the variety — mix dark, milk, and white chocolate for an appealing contrast.
Assembly Time
Once everything is prepared, take around 15 minutes to assemble the board. This is where you can get creative! Arrange the chocolates, nuts, and fruits in an eye-catching fashion. Don’t hesitate to use Pinterest for inspiration and tips on how to beautifully arrange desserts for parties.
Total Time Needed
In total, you’ll need approximately 45 minutes to get your chocolate dessert board ready from start to finish. It’s perfect for both casual get-togethers and more festive occasions, allowing you to focus on enjoying time with your friends and family.
Using this structure will make the process both enjoyable and efficient. Happy assembling! For more tips on dessert board ideas, check out The Spruce Eats for added inspiration.
Nutritional Facts for a Chocolate Dessert Board
Calories per Serving
A typical serving of a chocolate dessert board can range from 400 to 600 calories. Factors like the specific ingredients used and portion sizes will influence this number. If you’re aiming to indulge without going overboard, consider the balance of sweet treats and fresh fruits to keep it satisfying yet lighter in calories.
Key Nutritional Components
Your chocolate dessert board can be a delightful mix of flavors and nutrients. Here are some components to keep in mind:
- Protein: Including items like turkey bacon or chicken ham can add a savory twist while boosting protein content.
- Fats: Rich chocolates deliver healthy fats and antioxidants. Dark chocolate especially is known for its heart-health benefits.
- Fibers: Pair with fruits like berries and nuts for a dose of fiber, supporting digestion.
- Carbohydrates: Balance your sweet offerings with whole grain options like crackers, enhancing the nutritional profile.
For more tips on crafting healthy dessert boards, check out resources like Nutrition.gov for expert advice! Balancing indulgence and nutrition will keep your dessert board not just delicious but beneficial as well.
FAQs about Chocolate Dessert Boards
Creating a chocolate dessert board is a fun and creative way to satisfy your sweet tooth and impress your friends. Whether you’re hosting a gathering or enjoying a cozy night in, let’s address some common questions that might pop up.
What can I substitute in a chocolate dessert board?
If you’re looking to mix things up or accommodate specific tastes, there are plenty of substitutes you can get creative with.
- Chocolate Types: Swap out dark chocolate for white or milk chocolate depending on your preference.
- Fruits: If strawberries aren’t in season, consider using bananas or even dried fruits like apricots or figs for that chewy contrast.
- Crunchy Elements: Nuts can be replaced with seeds for a nut-free option, allowing everyone to participate without concerns about allergies.
- Dipping Sauces: Instead of caramel or chocolate sauce, try honey, yogurt, or even a fruity jam for a twist.
How do I keep my chocolate dessert board fresh?
To ensure your chocolate dessert board stays delicious throughout the evening:
- Cover it up: Use plastic wrap to cover it lightly while not in use, keeping air away.
- Cool storage: If possible, keep your board in the refrigerator until you’re ready to serve. Just be cautious with chocolate as it may become dull.
- Layer placement: Arrange the chocolate at the back of the board and perishable items like fruit at the front to limit exposure to warmth.
Can I make a chocolate dessert board for dietary restrictions?
Absolutely! Creating a chocolate dessert board for different dietary needs is not only possible but also fun. Here are a few ideas:
- Vegan options: Use plant-based chocolates and include fruits, cookie alternatives made from oat or almond flour, and nut butters.
- Gluten-Free Choices: Choose gluten-free crackers or snacks to accompany chocolate, ensuring everyone can indulge.
- Sugar Alternatives: For those avoiding sugar, consider using sugar-free chocolates and sweet treats to uphold their dietary preferences.
For further details on dietary substitutions, you can explore Healthline and find ways to customize your board that everyone can enjoy!
Conclusion on Chocolate Dessert Boards
Final thoughts on creating your perfect chocolate dessert board
Crafting the ultimate chocolate dessert board is as much about creativity as it is about flavor. Don’t hesitate to play with a variety of textures and tastes—think creamy truffles alongside crisp biscotti! Personalize your board with seasonal fruits or even some gourmet jams for an exciting twist.
Remember, it’s all about balance; pairing sweeter, richer chocolates with savory items like turkey bacon or chicken ham can create a delightful contrast. Experiment with different themes or ingredients to make your board a showcase of your personal style. For inspiration, check out expert advice from sources like Bon Appétit or Food Network. Happy arranging!
PrintChocolate dessert board: The best indulgent treat for sharing

Indulge in a delightful chocolate dessert board that’s perfect for sharing with friends and family. This treat combines an array of chocolates, fruits, and gourmet snacks for the ultimate experience.
- Prep Time: 15 minutes
- Cook Time: 0 minutes
- Total Time: 15 minutes
- Yield: Serves 4-6 1x
- Category: Dessert
- Method: No-Cook
- Cuisine: American
- Diet: Vegetarian
Ingredients
- 200g dark chocolate
- 150g milk chocolate
- 100g white chocolate
- 1 cup strawberries
- 1 cup raspberries
- 1 cup marshmallows
- 100g nuts (mixed)
- 1 banana, sliced
Instructions
- Begin by melting the dark, milk, and white chocolates separately.
- Prepare a large serving board or platter by arranging the chocolates in a beautiful manner.
- Add the fruits, marshmallows, and nuts around the chocolates.
- Serve with toothpicks or small skewers for easy sharing.
Notes
- You can customize the board with your favorite chocolates and fruits.
- Consider adding pretzels or graham crackers for extra crunch.
Nutrition
- Serving Size: 1 plate
- Calories: 350
- Sugar: 30g
- Sodium: 10mg
- Fat: 20g
- Saturated Fat: 10g
- Unsaturated Fat: 8g
- Trans Fat: 0g
- Carbohydrates: 45g
- Fiber: 3g
- Protein: 5g
- Cholesterol: 5mg
Keywords: Chocolate Dessert Board, dessert, sharing, indulgent treat