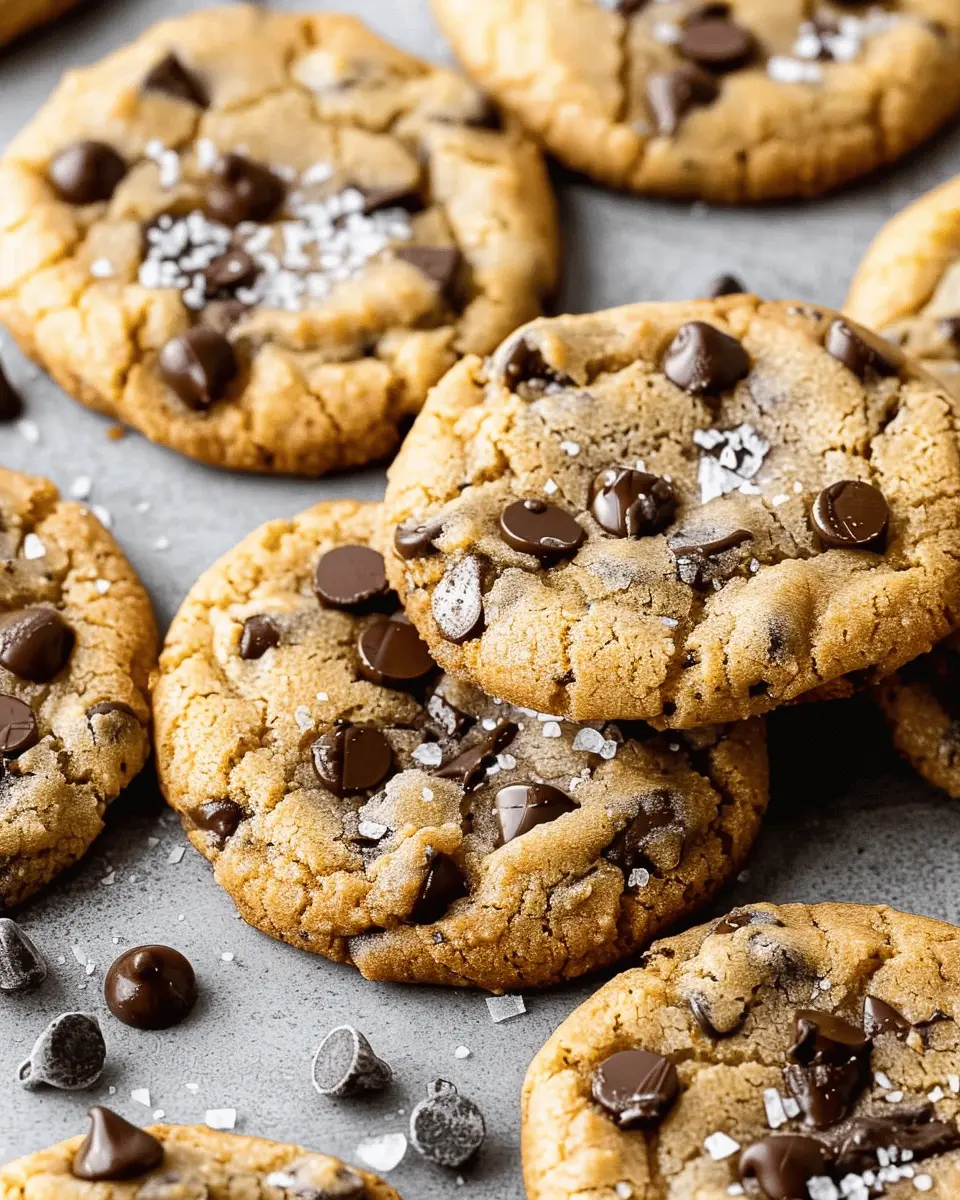
Introduction to Chocochip Cookies Recipe
When it comes to sweet treats, few things evoke the warmth of nostalgia quite like homemade chocochip cookies. The moment you pull a tray of freshly baked cookies from the oven, the rich aroma floods your kitchen and brings back memories of childhood. Why are these little nuggets of joy so beloved? Let’s explore what makes a chocochip cookies recipe shine.
Why Homemade Chocochip Cookies are the Best?
One of the most compelling reasons to whip up a batch of homemade chocochip cookies is the unmatched quality of ingredients. Unlike store-bought varieties that often contain preservatives and artificial flavors, your homemade cookies can be crafted with freshness in mind. You control the ingredients, ensuring your cookies are as wholesome (or indulgent) as you want.
-
Fresh Ingredients: Using fresh eggs and real butter not only enhances flavor but also improves texture. The result? Cookies that are soft, gooey, and melt-in-your-mouth delicious.
-
Customization: Ever wondered what it’s like to bite into a cookie brimming with extra chocolate? When you make them yourself, you can adjust the chocolate to cookie ratio or toss in your favorite nuts, making each batch truly your own.
-
Satisfaction of Creation: There’s something immensely satisfying about baking, isn’t there? The act of transforming simple ingredients into a delightful treat not only boosts your mood but can also alleviate daily stress. You get to engage with each step — from measuring and mixing to the glorious anticipation of the baking timer going off.
Additionally, homemade chocochip cookies can be a fun way to impress friends at gatherings or bring a smile to loved ones who might need a pick-me-up. Sharing your baked goods can forge connections and create lasting memories, reinforcing the notion that food is best enjoyed when shared.
Curious about what makes a good cookie even better? Check out this article on cookie science to delve deeper into the chemistry behind those wonderful baked goods.
So, get your apron on and prepare for the delightful experience that is making your very own batch of chocochip cookies. Trust me, once you’ve tried making them from scratch, you won’t want to go back!
Ingredients for Chocochip Cookies
Essential Ingredients for the Perfect Chocochip Cookies
If you’re on the hunt for the ultimate chocochip cookies recipe, you’ve come to the right place! Let’s break down the essential ingredients you’ll need to create cookies that are soft, chewy, and packed with flavor.
- All-Purpose Flour: The backbone of your cookies. For a perfect texture, use about 2 ¼ cups.
- Baking Soda: This helps the cookies rise and adds to that lovely chewiness—about 1 teaspoon will do.
- Salt: Just a pinch (around ½ teaspoon) enhances the sweetness of your chocolate chips.
- Unsalted Butter: Use 1 cup, softened to room temperature for a creamy dough.
- Brown Sugar: 1 cup, packed. This is crucial for moisture and that classic caramel flavor!
- Granulated Sugar: Add about ½ cup for extra sweetness.
- Vanilla Extract: 2 teaspoons will elevate the flavor profile significantly.
- Eggs: You’ll need 2 large eggs, which act as a binder.
- Chocolate Chips: Go for 2 cups of semisweet or dark chocolate chips, your choice!
These simple yet fundamental ingredients are the secret to achieving that ideal chocochip cookie texture. Don’t forget to explore the origins of your ingredients at The Baking Expert for more tips and tricks!
Step-by-Step Preparation of Chocochip Cookies
Making the ultimate chocochip cookies is a delightful process that fills your kitchen with the irresistible aroma of baked goodness. Whenever I feel the need for a little comfort, I always turn to this classic recipe that never fails to satisfy. In this section, we’ll walk through each step together, ensuring you create perfectly chewy and delicious cookies that will leave your friends and family craving for more. Let’s start baking!
Preheat and Prepare Your Workspace
First things first—preheating your oven is essential for achieving that perfect cookie texture. Set your oven to 350°F (175°C). While it heats up, grab your baking sheets and line them with parchment paper. This little step will help prevent your cookies from sticking and makes for an easy cleanup afterward. You wouldn’t want to start baking with a messy workspace, right? Now, measure out your ingredients to have everything ready to go.
Mix the Dry Ingredients Together
Grab a mixing bowl and toss in the all-purpose flour, baking soda, and a pinch of salt. Mixing these dry ingredients together beforehand ensures even distribution of the leavening agent, contributing to a perfectly risen cookie. Use a whisk or fork to blend them well; it only takes a minute. If you want to deepen the flavor, consider adding a sprinkle of cinnamon for a warm touch.
Cream the Butter and Sugars
In a separate bowl, it’s time to cream your butter and sugars together. Use about 1 cup of softened unsalted butter, along with 3/4 cup of brown sugar and 3/4 cup of granulated sugar. The key tactic here is to beat them together until the mixture becomes light and fluffy, creating a lovely texture for your cookies. This part is crucial because well-creamed sugar and butter help create a great base for your dessert.
Incorporate the Eggs and Vanilla
Now, one by one, add in two large eggs and a splash of vanilla extract (about 2 teaspoons). The eggs add moisture and richness, while vanilla enhances sweetness. Beat the mixture long enough for it to combine well—about 1-2 minutes should do the trick. Your batter should start looking luscious already!
Combine the Dry and Wet Ingredients
Here comes the exciting part! Gradually add your dry ingredient mixture to the creamed butter and sugar. Do this slowly, mixing gently with a spatula or wooden spoon. Your goal is to incorporate the flour without overmixing, which ensures your cookies have that desirable chewy texture. If you see some flour remnants, it’s perfectly okay—sometimes a little bit of flour can lead to a more tender cookie.
Add the Chocolate Chips
This is where the magic happens! Stir in about 2 cups of chocolate chips, whether you prefer semi-sweet, dark, or even milk chocolate. If you’re feeling adventurous, mix in some nuts or dried fruit for a different flavor profile. It’s your cookie; make it your own!
Shape the Cookies
Using a cookie scoop or a tablespoon, portion out the chocochip cookie dough onto the prepared baking sheets. Leave ample space between each mounds (about 2 inches), as they will spread while baking. I love to slightly flatten the tops for that perfect look!
Bake the Cookies to Perfection
Finally, pop the baking sheets into your preheated oven and let them bake for about 10-12 minutes, or until they’re golden brown around the edges. Keep a close eye on them, as ovens can vary. Remove them from the oven, and allow them to cool for a few minutes on the baking sheet before transferring them to a wire rack. This simple step is crucial; it helps them to set properly, giving you that ideal chewy center with a slight crispness around the edges.
Now, with your delicious chocochip cookies ready, don’t forget to share with friends—or keep them all for yourself! For more tips and variations on this beloved recipe, be sure to explore additional baking resources and kitchen tutorials that can elevate your baking skills even further. Happy baking!
Variations on Chocochip Cookies
When it comes to your chocochip cookies recipe, the possibilities are endless! Let’s explore some delightful variations to elevate your baking game.
Nutty Chocochip Cookies
If you’re a fan of crunch, adding nuts can bring an exciting twist to your classic chocochip cookies. Walnuts, pecans, or even hazelnuts can provide that extra bite. Simply fold in one cup of your favorite nuts into the dough. This complement of flavors pairs beautifully with the melted chocolate and adds a depth of texture to each cookie.
Gluten-Free Chocochip Cookies
Do you or someone you know follow a gluten-free diet? No problem! Swapping traditional flour for a gluten-free blend is a breeze. You can find excellent options at stores or whip up your own mix using almond flour, coconut flour, and a bit of tapioca flour for binding. Just remember, you might need to adjust the baking time slightly to achieve that perfect golden edge.
For additional guidance on gluten-free baking, check out this helpful resource.
Chocochip Cookies with a Twist
Feeling adventurous? Try infusing your chocochip cookies with unexpected flavors. Consider adding a teaspoon of instant coffee for a mocha flavor or a sprinkle of sea salt on top just before baking to enhance the chocolatey goodness. Mix in dried fruit like cranberries or apricots for a chewy surprise. You can even swap some of the chocolate chips for butterscotch or white chocolate for a fun variation.
With these fun twists and adjustments, your chocochip cookies recipe can become a go-to for any occasion, satisfying every palate at the table. Happy baking!
Baking Tips and Notes for Chocochip Cookies
Common Pitfalls to Avoid
Baking chocochip cookies seems simple, but many can fall into a few common traps:
- Overmixing the Dough: Mixing too vigorously can lead to tougher cookies. Aim for just combined ingredients.
- Incorrect Oven Temperature: Always double-check your oven’s temperature with an oven thermometer. Baking at the wrong temp can alter the texture.
- Skipping Chilling: If your recipe calls for chilling the dough, don’t skip this step. It firms up the butter, helping prevent spreading and yielding better texture.
Ingredient Storage Tips
Proper storage ensures your ingredients maintain freshness:
- Flour: Keep it in an airtight container in a cool, dark place. It can last up to six months this way.
- Chocolate Chips: Store them similarly or in the fridge to extend shelf life. Chocolate can lose flavor over time!
- Brown Sugar: To prevent hardening, keep it in a sealed bag or container with a moist paper towel.
For more baking wisdom, consider checking out sources like King Arthur Baking for tips and best practices. Happy baking!
Serving Suggestions for Chocochip Cookies
Best accompaniments for chocochip cookies
When enjoying your delicious chocochip cookies, think beyond the classic milk pairings! Here are some perfect accompaniments to elevate your treat:
- Freshly Brewed Coffee: The bitterness of coffee beautifully complements the sweetness of chocolate.
- Plant-Based Milk: Almond or oat milk can add a creamy texture without overpowering the flavors.
- Hot Chocolate: Go indulgent with a steaming cup of hot chocolate to amplify the chocolaty goodness.
According to a recent study by the National Coffee Association, 64% of Americans enjoy their cookies with a hot beverage, making it a classic combo!
Creative serving ideas
Want to impress your friends or treat yourself? Here are some fun serving ideas for your chocochip cookies recipe:
- Ice Cream Sandwiches: Place a scoop of your favorite ice cream between two cookies for a delicious fusion of flavors.
- Cookie Platter: Arrange a mix of your homemade cookies and store-bought options for visual appeal at your next gathering.
- Cookie Crumble Topping: Crush your cookies and sprinkle them over yogurt or desserts for added texture and taste.
These simple ideas can turn your chocochip cookies into an extraordinary culinary experience that friends and family will rave about! Give them a try, and let the cookie magic begin!
Time Breakdown for Chocochip Cookies
When you’re ready to dive into the delicious world of baking, understanding the time commitment for your chocochip cookies recipe is invaluable. Here’s a friendly breakdown:
Preparation Time
Expect to spend about 15-20 minutes gathering your ingredients, mixing your dough, and readying your baking sheets. Whether you’re measuring out the chocolate chips or creaming that butter and sugar together, taking your time ensures a better cookie!
Baking Time
Once your dough is ready, it’s go-time! Bake the cookies for about 10-12 minutes. Keep an eye on them; no one wants burnt edges on those beautiful cookies.
Cooling Time
After baking, let the cookies cool for about 5-10 minutes on the baking sheets before transferring them to a wire rack. This step is essential for that perfect chewy texture.
Total Time
In total, you’re looking at around 30-45 minutes of delightful cookie-making. Isn’t that worth it for a warm, gooey treat?
If you’re curious about other baking-related timing tips, you might enjoy checking out resources from the Joy of Baking or Serious Eats. They have fantastic insights that can elevate your baking skills even further!
Nutritional Facts for Chocochip Cookies
Calories per serving
When diving into the delightful world of chocochip cookies, it’s handy to know the calories involved. Typically, a standard cookie contains around 150 calories. While it may be easy to indulge, moderation is vital. If you grab a couple with your afternoon coffee, those calories can add up quickly!
Key nutritional components
A chocochip cookies recipe not only satisfies your sweet tooth but also packs in some noteworthy nutrition. Here’s a quick glimpse:
- Fat: Provides energy and aids in nutrient absorption.
- Carbohydrates: The primary source of energy, helping you power through your day.
- Protein: Essential for muscle repair and growth, coming from ingredients like eggs.
- Vitamins & Minerals: Ingredients like brown sugar and eggs offer trace amounts of important nutrients.
For a deeper dive into how your favorite cookies can fit into a balanced diet, check out resources like the USDA FoodData Central for detailed breakdowns. Remember, enjoying a homemade chocochip cookie can be part of a healthy, fulfilling diet!
FAQs about Chocochip Cookies
When diving into the world of baking, especially with a beloved chocochip cookies recipe, it’s natural to have questions. Let’s address some common inquiries to enhance your cookie-baking experience.
How do I store chocochip cookies properly?
To keep your cookies fresh and delicious, it’s crucial to store them correctly. Here are some tips:
- Cool Completely: Always let your cookies cool completely before storing them; this prevents excess moisture.
- Airtight Container: Use an airtight container to maintain freshness. If you have different types of cookies, consider separating them to avoid flavor mixing.
- Room Temperature: Store them at room temperature for up to a week, or pop them in the freezer for longer shelf life. In the freezer, they can last for up to three months!
Can I use different types of chocolate chips?
Absolutely! This is one of the joys of baking. While semi-sweet chocolate chips are classic, feel free to experiment with:
- Milk chocolate for a sweeter taste
- Dark chocolate for a rich flavor
- White chocolate for a creamy twist
- Even mix in some peanut butter chips or butterscotch chips for a fun variation
By switching up the chocolate, you’ll find that you can create delightful new flavor profiles with your chocochip cookies recipe.
What can I do if my cookies spread too much?
If your cookies resemble pancakes after baking, don’t fret! Here are some troubleshooting tips:
- Chill the Dough: Refrigerating your dough for at least 30 minutes before baking can help prevent spread.
- Check Your Measurements: Make sure you’re using the right ingredient ratios – too much butter can cause cookies to spread out.
- Oven Temperature: Ensure your oven is preheated correctly; using an oven thermometer can make a difference in achieving the perfect bake.
For more baking tips from experts, check out the Food Network for reliable guidance! Happy baking!
Conclusion on Chocochip Cookies
Summarizing the Joys of Homemade Chocochip Cookies
There’s something incredibly satisfying about whipping up a batch of fresh chocochip cookies. The aroma that fills your kitchen is enough to improve anyone’s mood, right? Baking these treats isn’t just about the delightful flavors; it’s an experience that taps into our nostalgia and invites creativity. Whether you enjoy them warm and gooey or crisped to perfection, they always hit the spot.
Next time you want a sweet fix, try our chocochip cookies recipe. It’s an easy journey into comfort food that promises joy for you and anyone lucky enough to share. For more baking tips, check out resources like Fine Cooking. Happy baking!
PrintChocochip Cookies Recipe: The Best Indulgent Treat for Everyone

Indulge in the rich and delicious flavors of homemade chocochip cookies that are sure to please everyone.
- Prep Time: 15 minutes
- Cook Time: 10 minutes
- Total Time: 25 minutes
- Yield: 24 cookies 1x
- Category: Dessert
- Method: Baking
- Cuisine: American
- Diet: Vegetarian
Ingredients
- 2 1/4 cups all-purpose flour
- 1/2 teaspoon baking soda
- 1 cup unsalted butter, softened
- 1/2 cup granulated sugar
- 1 cup packed brown sugar
- 1 teaspoon salt
- 2 teaspoons pure vanilla extract
- 2 large eggs
- 2 cups semisweet chocolate chips
Instructions
- Preheat the oven to 375°F (190°C).
- In a small bowl, mix the flour and baking soda; set aside.
- In a large bowl, cream together the softened butter, granulated sugar, brown sugar, and salt until smooth.
- Add the vanilla and eggs; beat until well blended.
- Gradually blend in the dry ingredients.
- Stir in the chocolate chips.
- Drop by tablespoons onto ungreased baking sheets.
- Bake for 9 to 11 minutes, or until golden brown.
- Let cool on racks.
Notes
- For a chewier cookie, chill the dough before baking.
- Try adding nuts for extra crunch.
Nutrition
- Serving Size: 1 cookie
- Calories: 150
- Sugar: 10g
- Sodium: 100mg
- Fat: 8g
- Saturated Fat: 5g
- Unsaturated Fat: 3g
- Trans Fat: 0g
- Carbohydrates: 20g
- Fiber: 1g
- Protein: 2g
- Cholesterol: 30mg
Keywords: Chocochip, Cookies, Recipe, Dessert